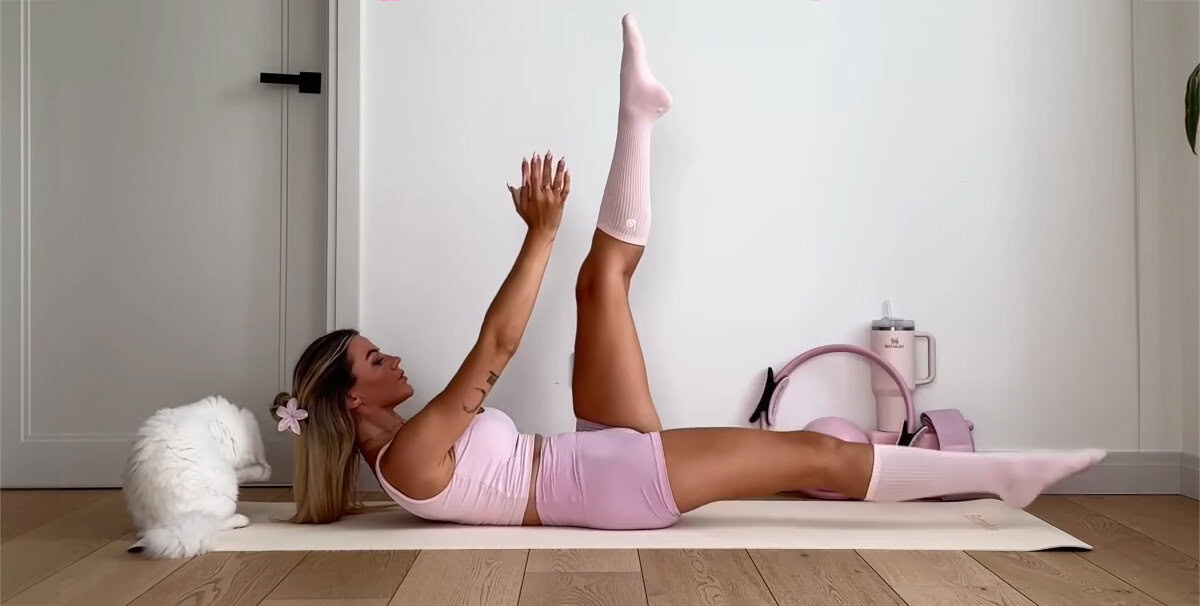
Dreaming of toned abs? Time to stop dreaming about it and start building a strong, flexible core.
Today’s basic calisthenics abs workout is broken down into 30-second exercises and targets the whole midsection. Plus, you won’t need more than an exercise mat and some tunes!
Alternating Leg Kicks
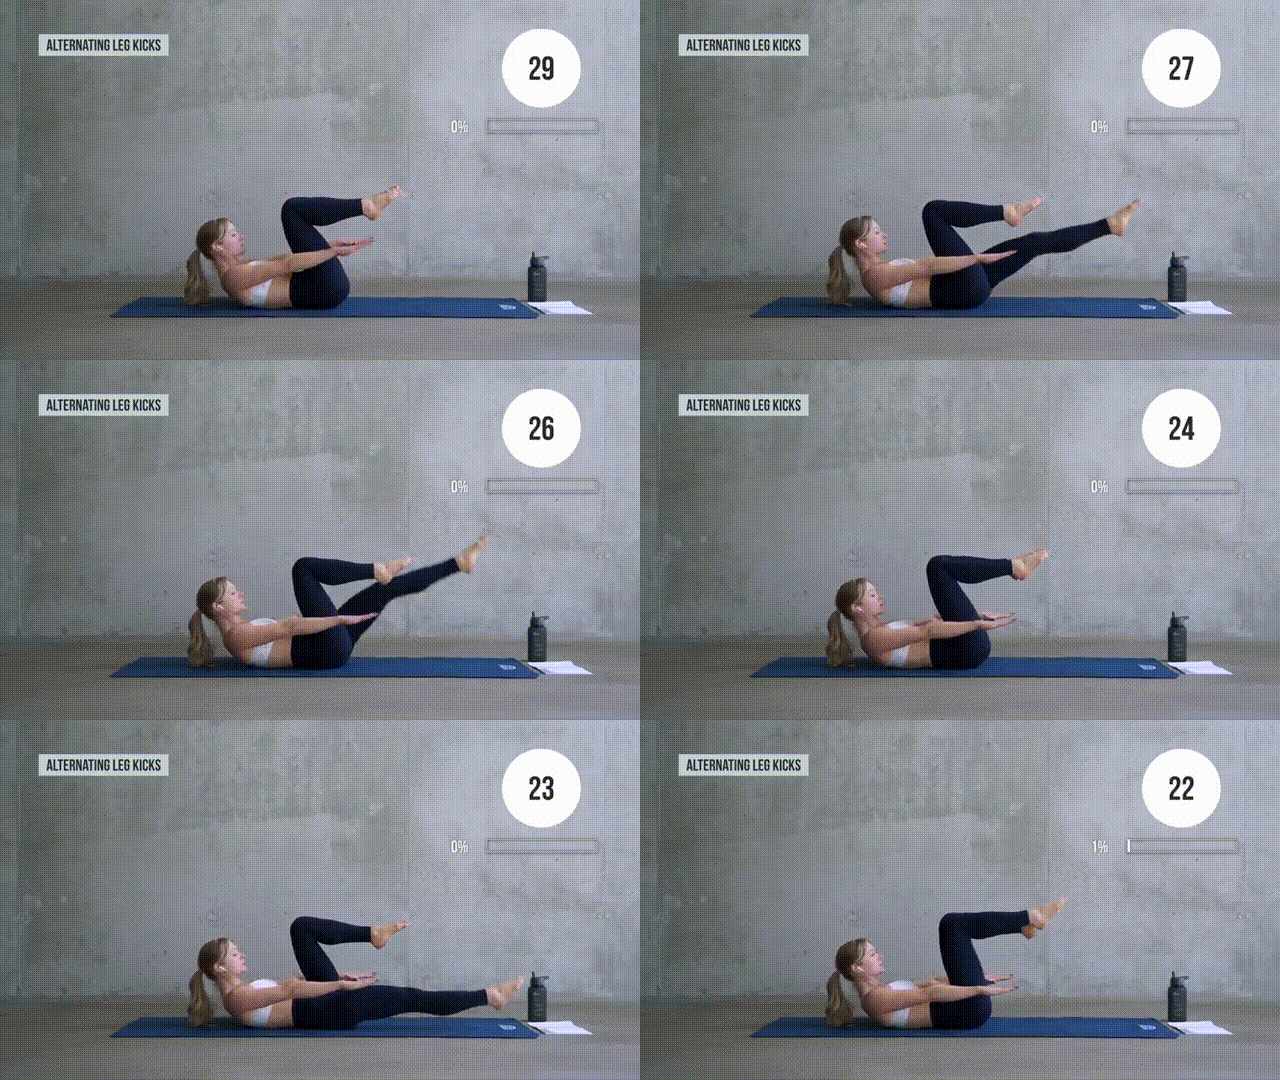
Let’s start with a calisthenics exercise that targets the upper abs and hits deep to activate the transverse abdominis.
How to perform:
- Lie on your back, brace your core, tuck your chin, and lift your shoulders off the ground. (You’ll use this starting position a lot in this workout!)
- If you struggle keeping your shoulders up, try stretching your arms out in front of you.
- Bend both knees 90° and bring them to your chest.
- Exhale as you extend your right leg and pause briefly before bringing it back up again.
- Repeat, alternating sides as you go.
Challenge Rounds
Reverse Crunches
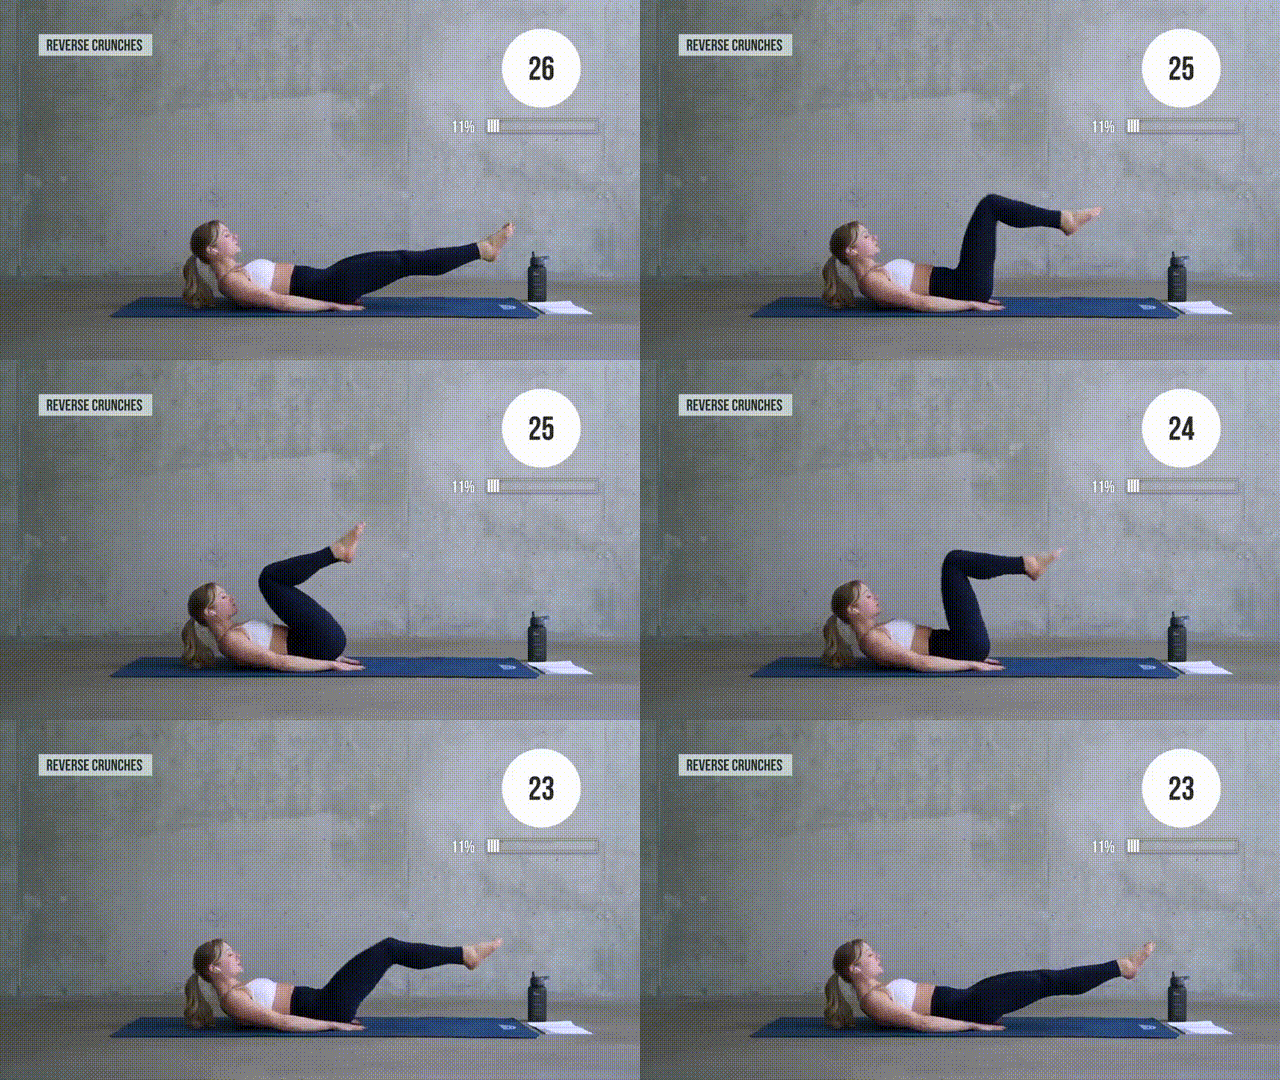
Crunches are almost non-negotiable for a strong rectus abdominis (yes, that’s the six-pack muscle). But there’s no need to do it the traditional way.
How to perform:
- Start in a supine position with extended legs.
- Contract your abs as you bend your knees and bring them toward your chest.
- Lower your hips and extend your legs.
- Repeat.
Flutter Kicks
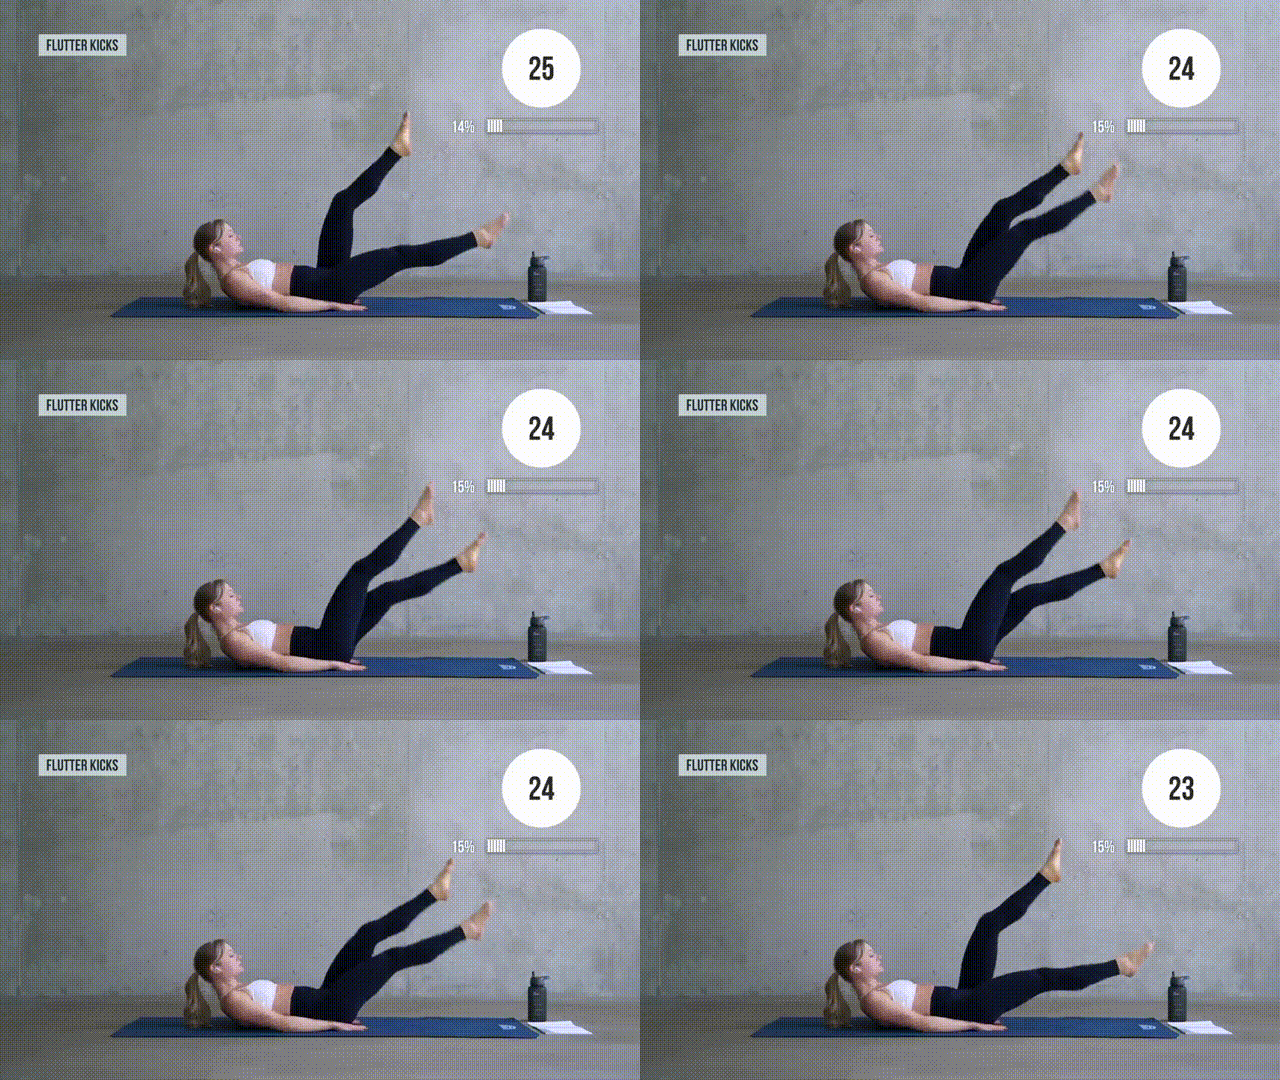
Call them flutters or scissor kicks. The name doesn’t matter much. They are still one of the best body-weight exercises for building lower abs.
How to perform:
- Get in the starting position.
- Put your hands under your hips for lower back support.
- Bring both legs to your chest and extend them out at once. Immediately start scissoring by raising one leg while lowering the other.
Alternating Toe Taps
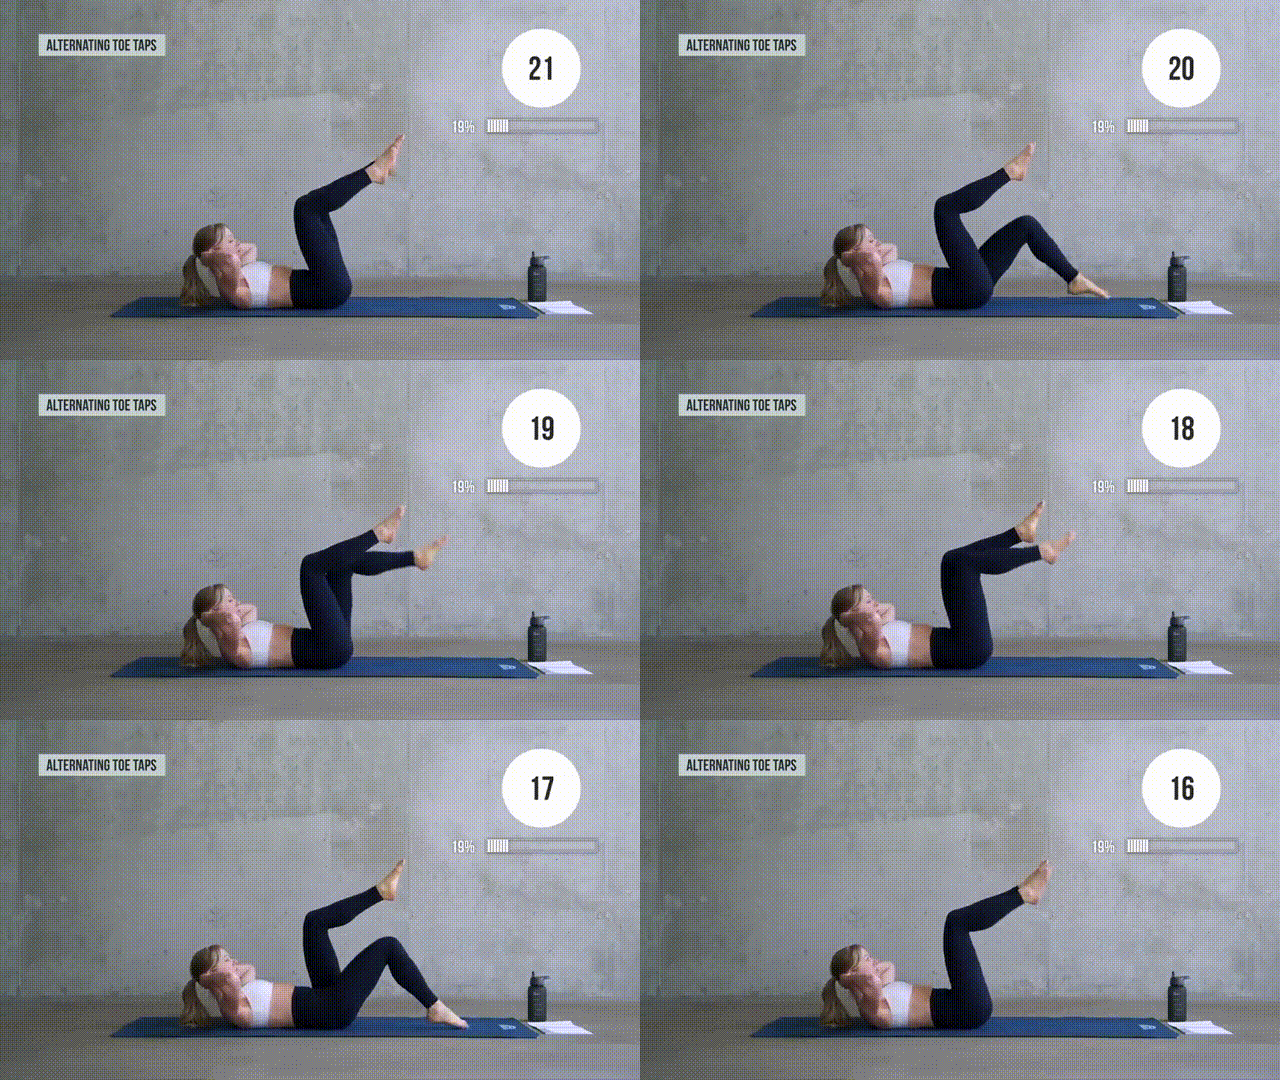
Supine toe taps may look easy. However, if you go nice and slow, your abs will burn like crazy.
How to perform:
- Assume the starting position.
- Raise your legs so that your knees are at a 90° angle and your calves are parallel to the ground.
- Keep your spine neutral and lower one foot until your toes touch the mat. Bring it back up.
- Repeat, alternating sides.
Knee Hug + Toe Tap
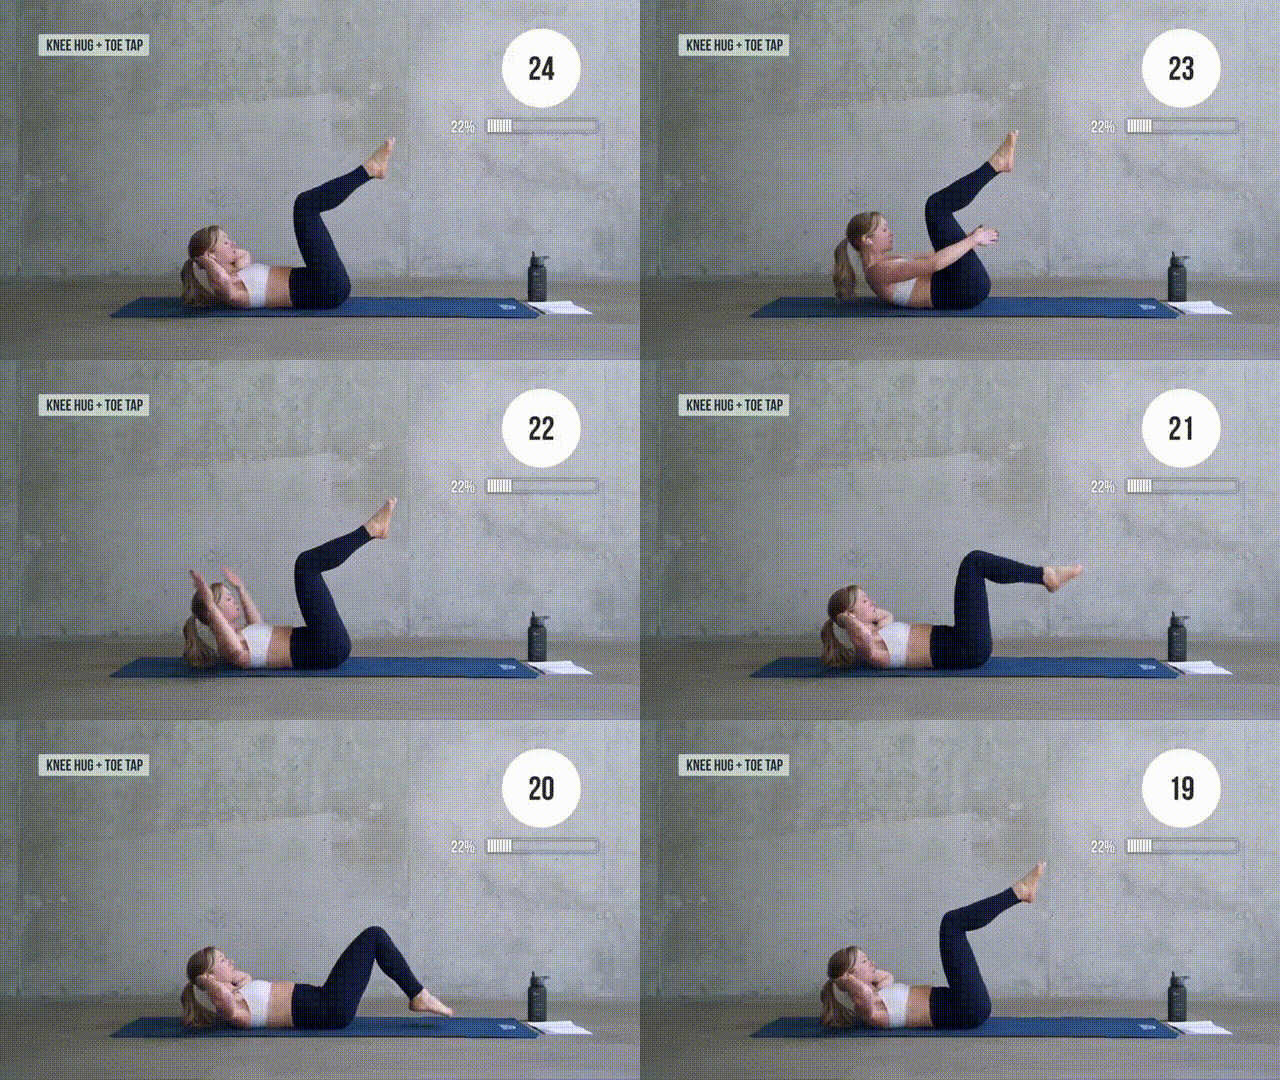
Next, we have a compound exercise for core activation without putting pressure on your lower back.
How to perform:
- Get in the starting position with your hands behind your head and your knees bent (as if you’re getting ready for toe taps).
- Clasp your hands below your knees.
- Bring your hands back behind your head and release both knees for a dual toe tap.
- Reverse and repeat.
Knee Hug + Hollow Hold
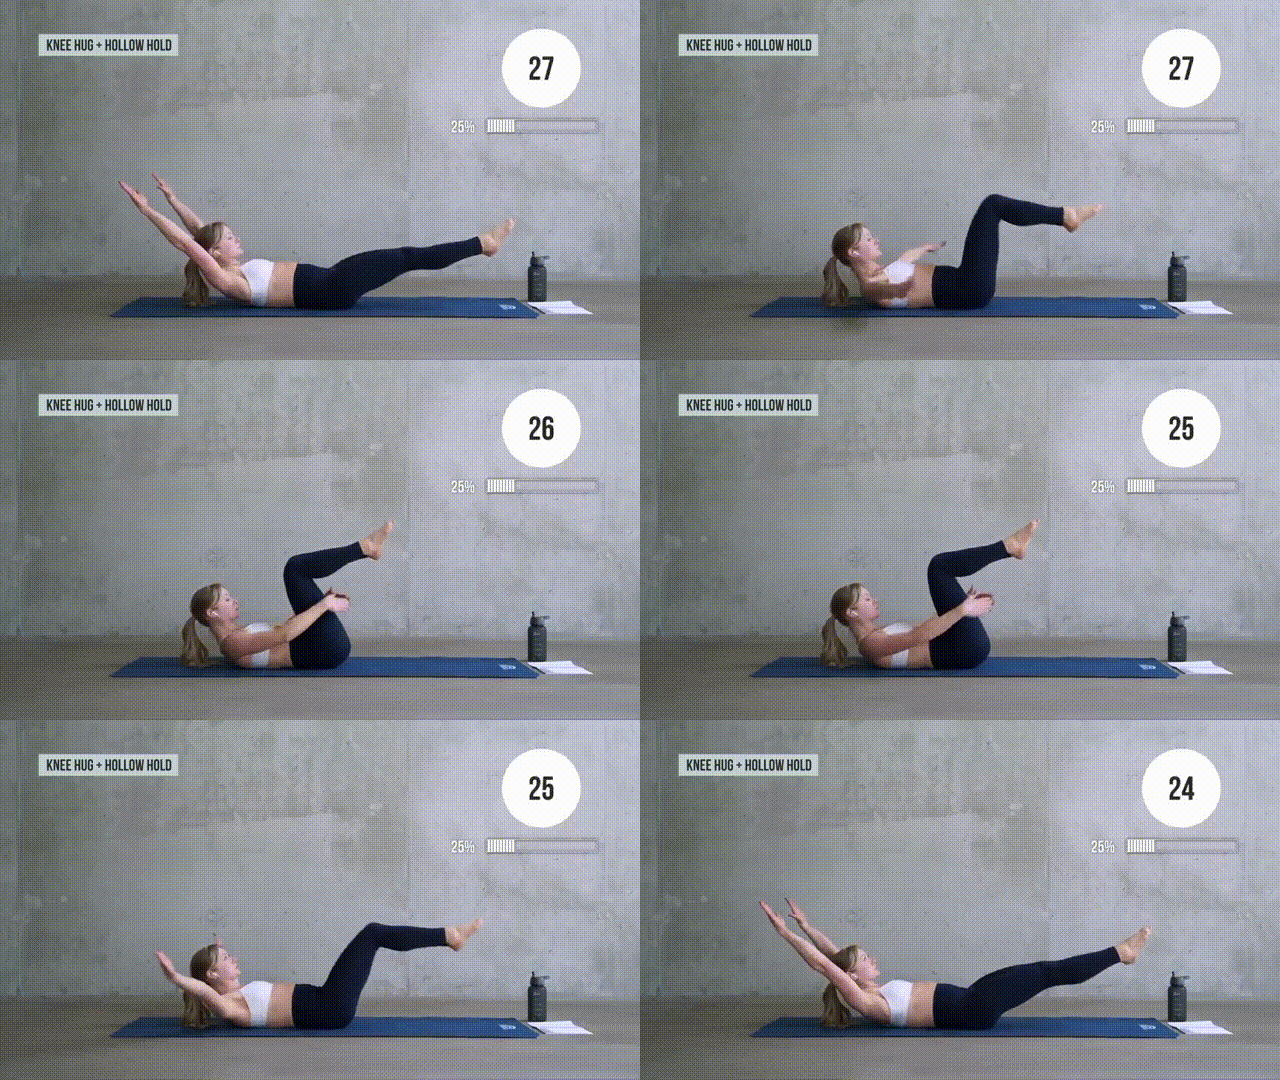
Like the burn you get from the knee hugs? Well, there’s more coming your way. This time, we’re combining the hugs with the hollow hold technique.
How to perform:
- Assume the starting position.
- Clasp your hands around your knees just like you did for the last exercise.
- Shift from the knee hug to a hollow hold with your legs and arms extended. Make sure your back and hips are glued to the floor!
- Pause, return, and repeat.
Challenge Round
Take a Breather!
Plank Hold
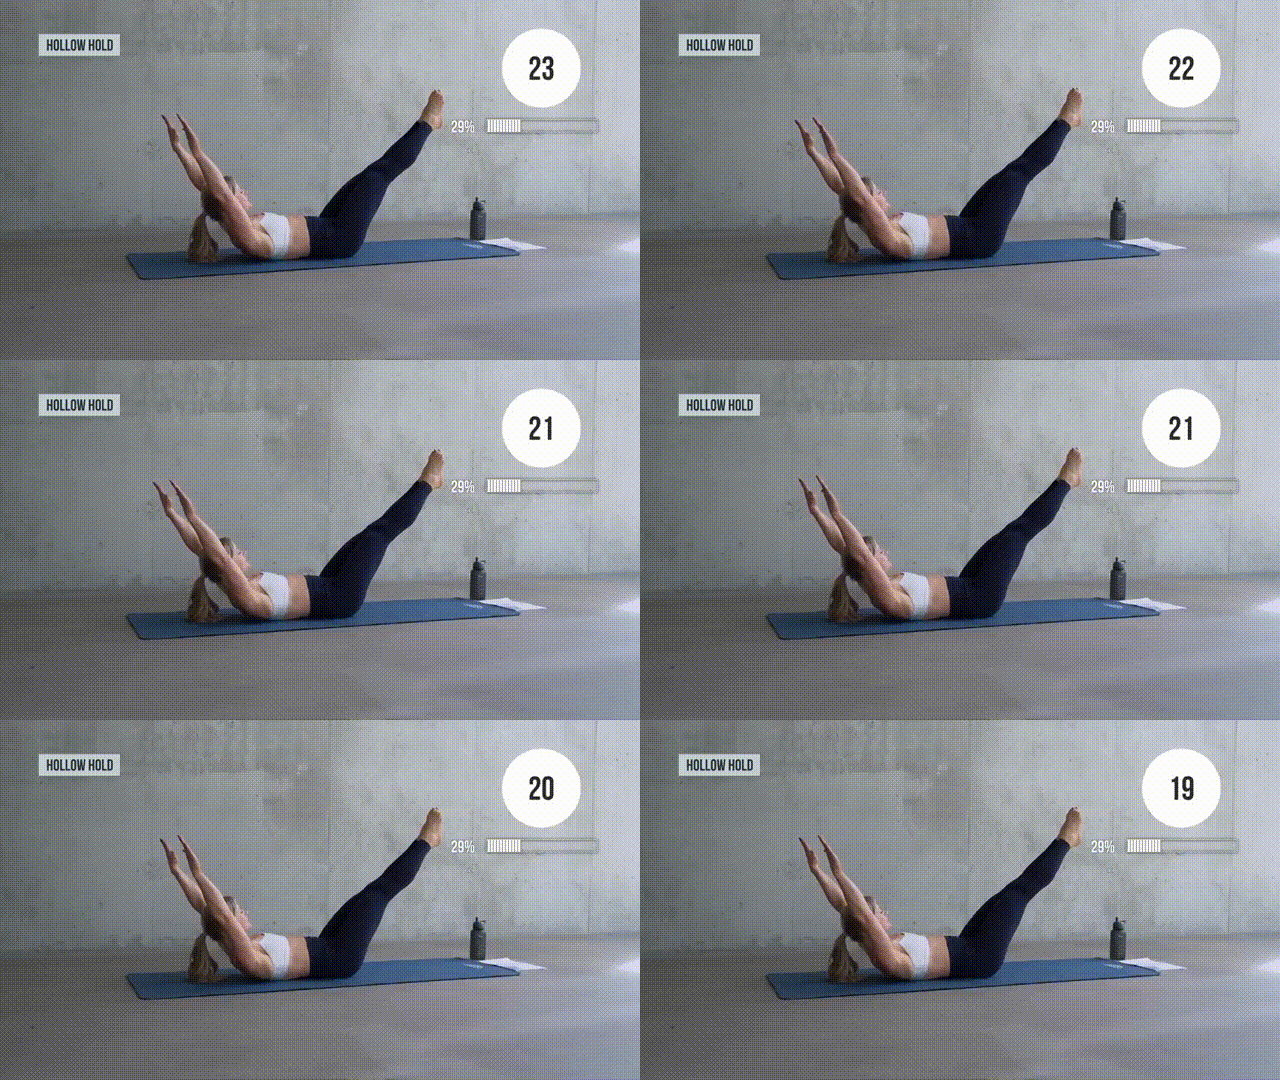
Let’s set the supine exercises aside for now. It’s time to work your core and lower body with planks.
How to perform:
- Get on all fours with your hands directly beneath your shoulders.
- Lift your knees.
- Maintain a neutral neck and a straight spine as you hold for 30 seconds.
Challenge Rounds
Plank-to-Bear Walk
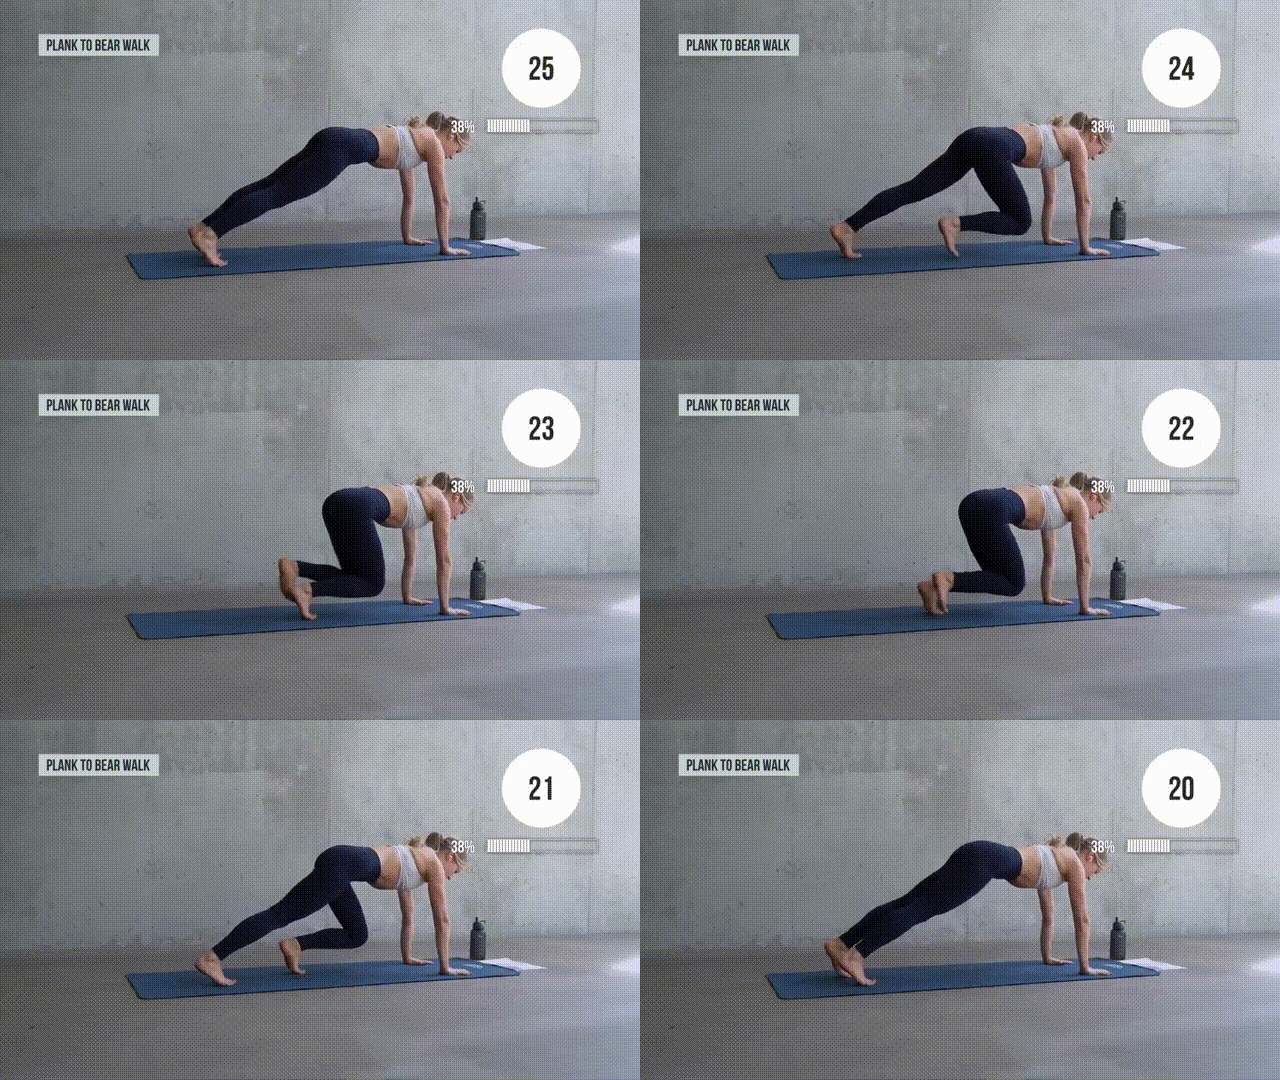
To cover the full muscle range, add a bear plank component to the good ol’ plank.
How to perform:
- Start with a regular high plank pose.
- Take a step forward (right leg first) to shift into a bear plank position.
- Reverse and repeat, alternating “leading” legs.
Bear Knee Drops
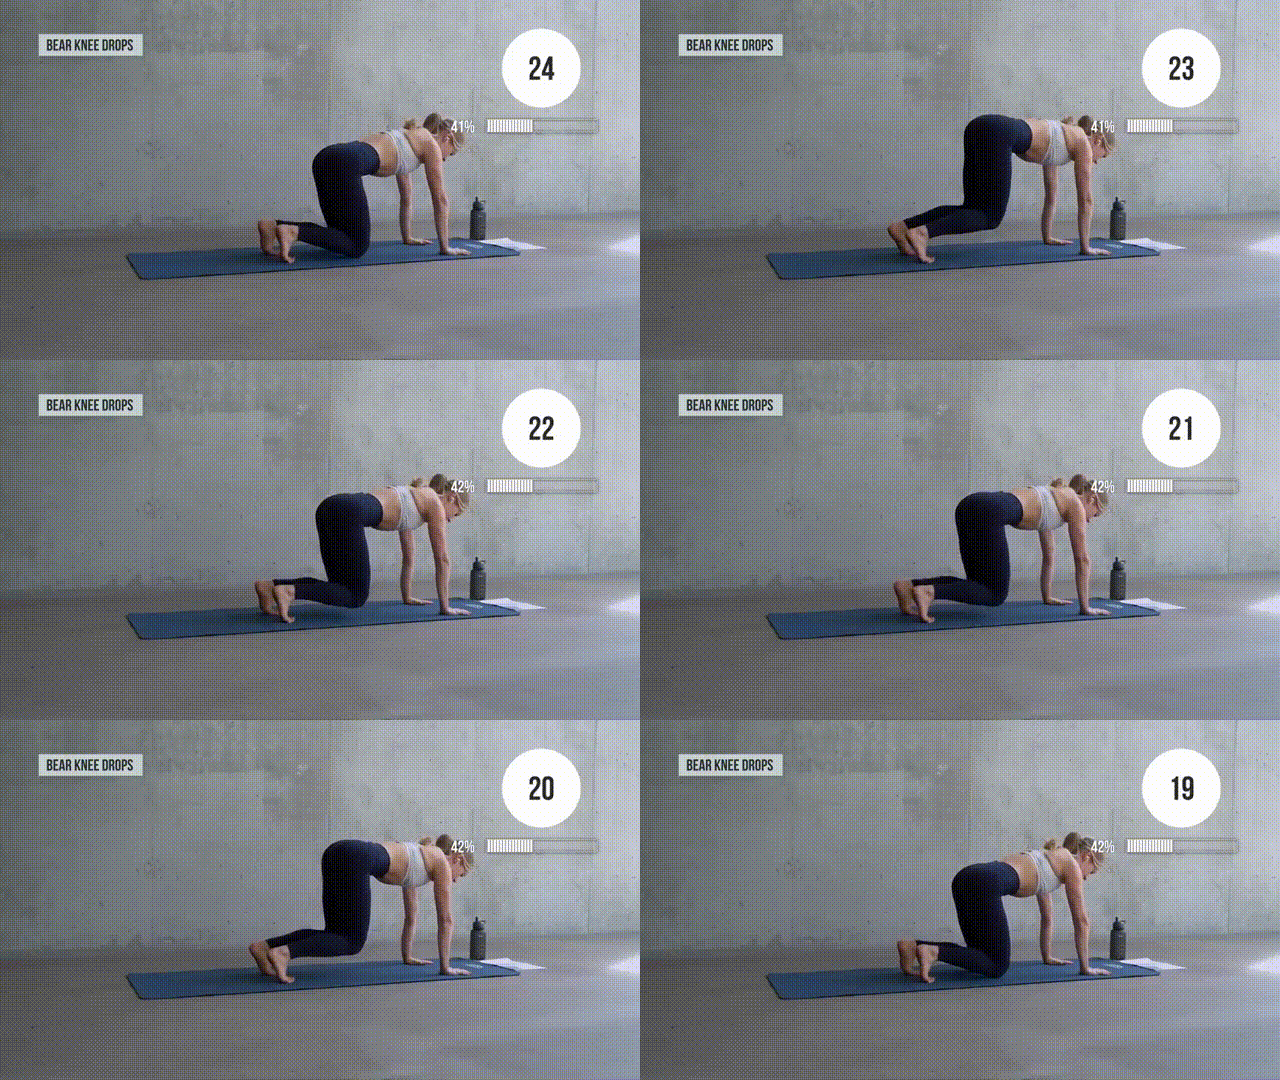
Don’t drop the bear plank just yet. We’re going for an advanced variation with repeated knee taps.
How to perform:
- Hold the bear plank position with your knees floating above the mat.
- Keep your chin and neck neutral, with your eyes fixed down.
- Slowly drop your knees to tap the floor.
- Get up and repeat.
Take a Breather!
Tuck Ups
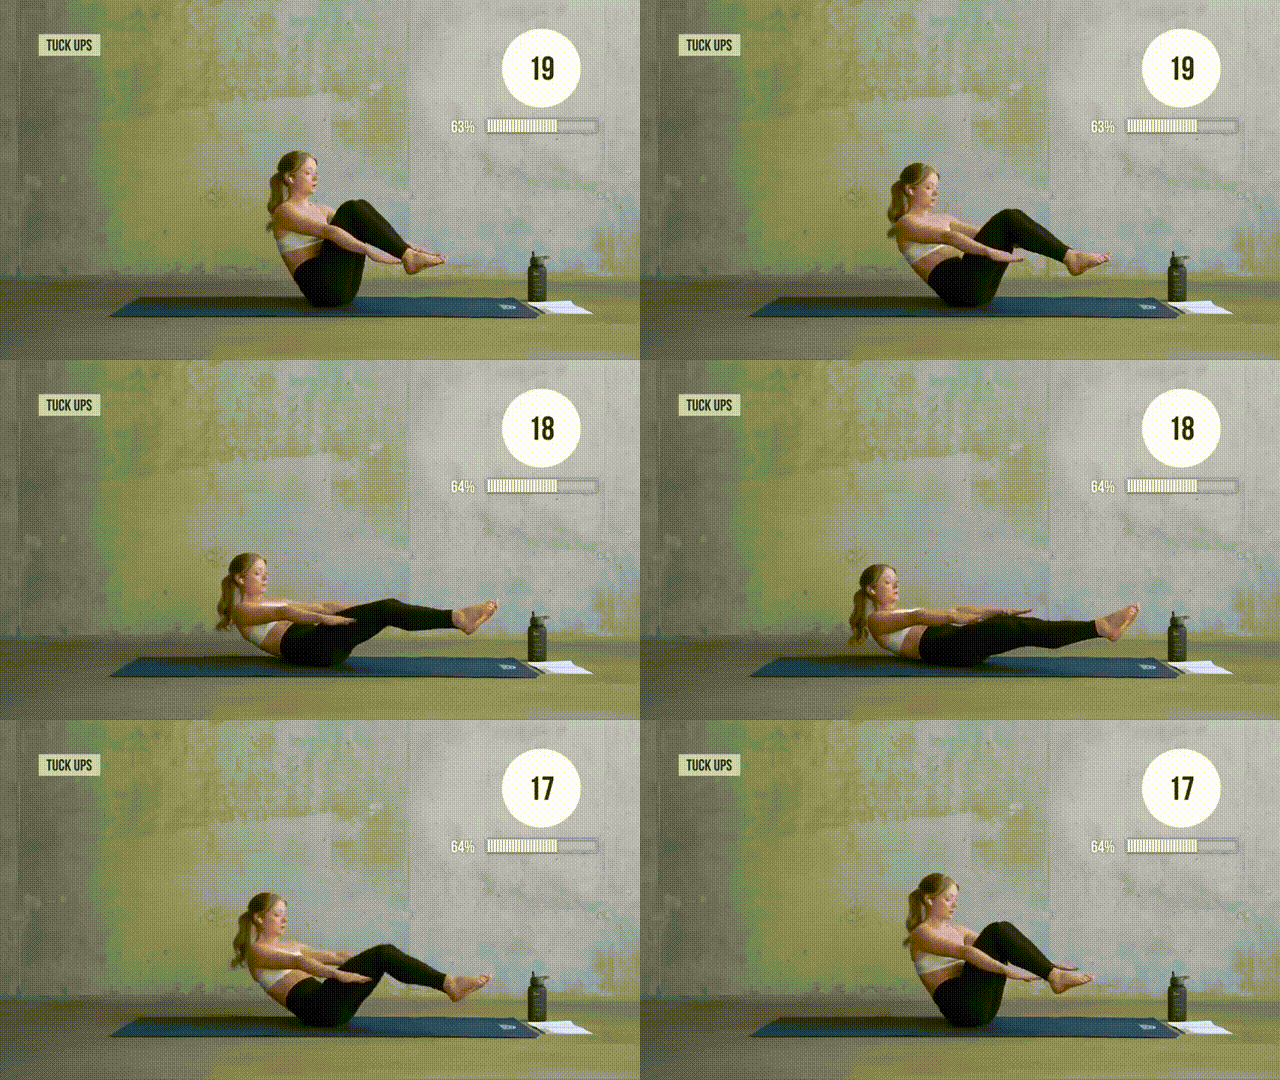
Much like the regular sit-up, the ab tuck targets the transverse abdominis, obliques, and the six-pack.
How to perform:
- Sit on the mat with your extended hands and knees bent close to the chest.
- In a controlled motion, extend your legs and let your upper body drop. Don’t touch the mat.
- Contract your abs to lift yourself.
- Repeat.
Boat Pose Hold
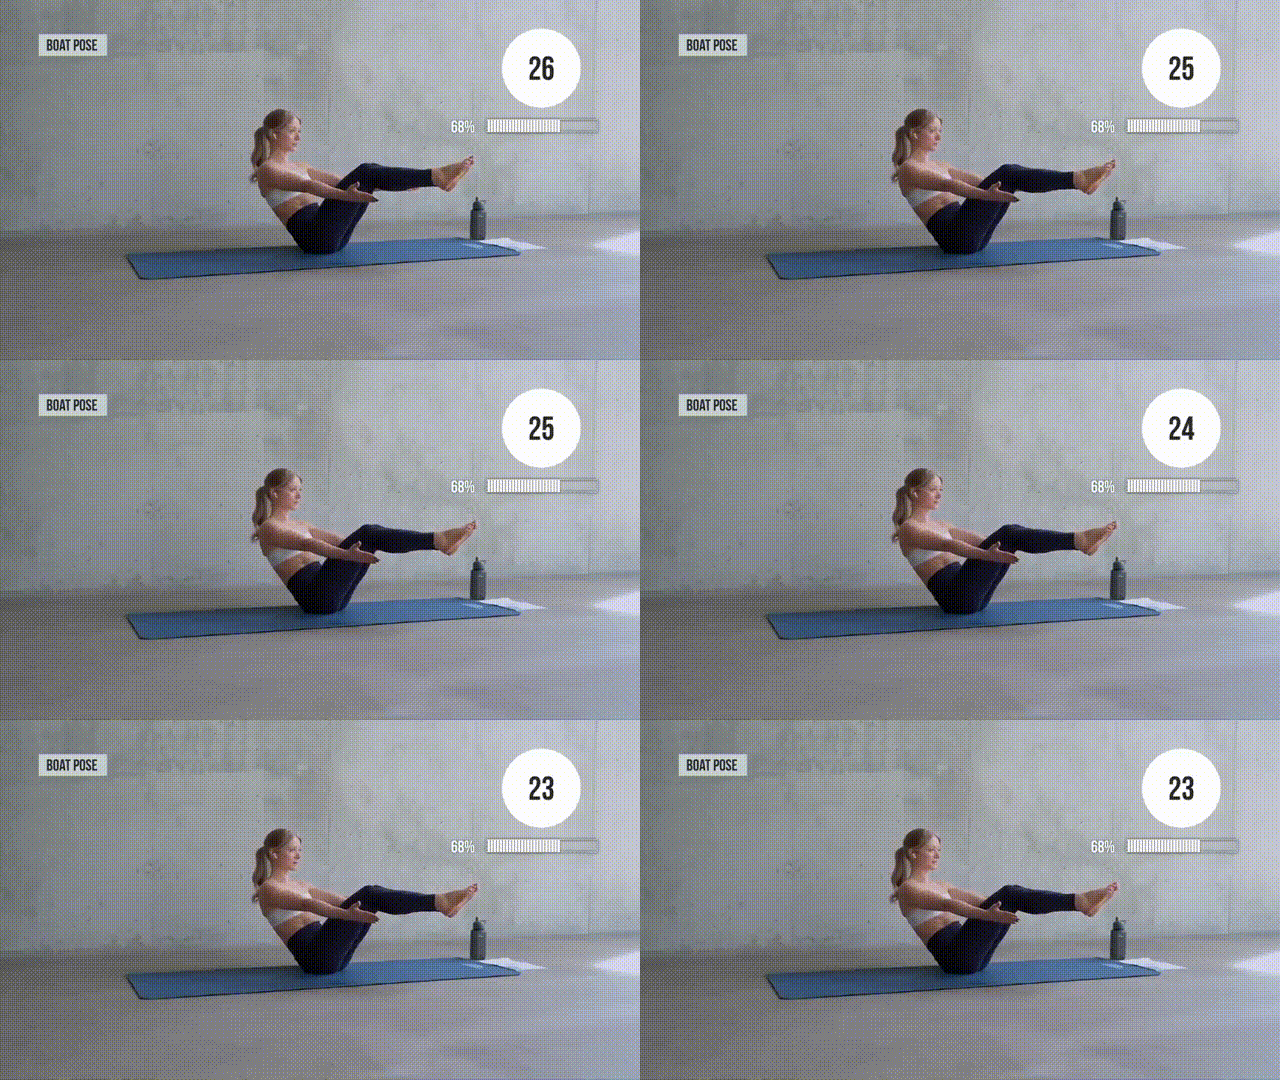
This full-body pose looks like it needs perfect balance. But we promise it’s easier than it seems. In fact, you can control the intensity by bending/extending your leg.
How to perform:
- Sit with your back straight and knees bent.
- Lean back slightly and lift your feet off the mat. Use your hand to hold on for support.
- Once you feel stable, you can stretch your arms.
- Hold for 30 seconds and keep breathing!
Challenge Rounds
Bicycle Crunches
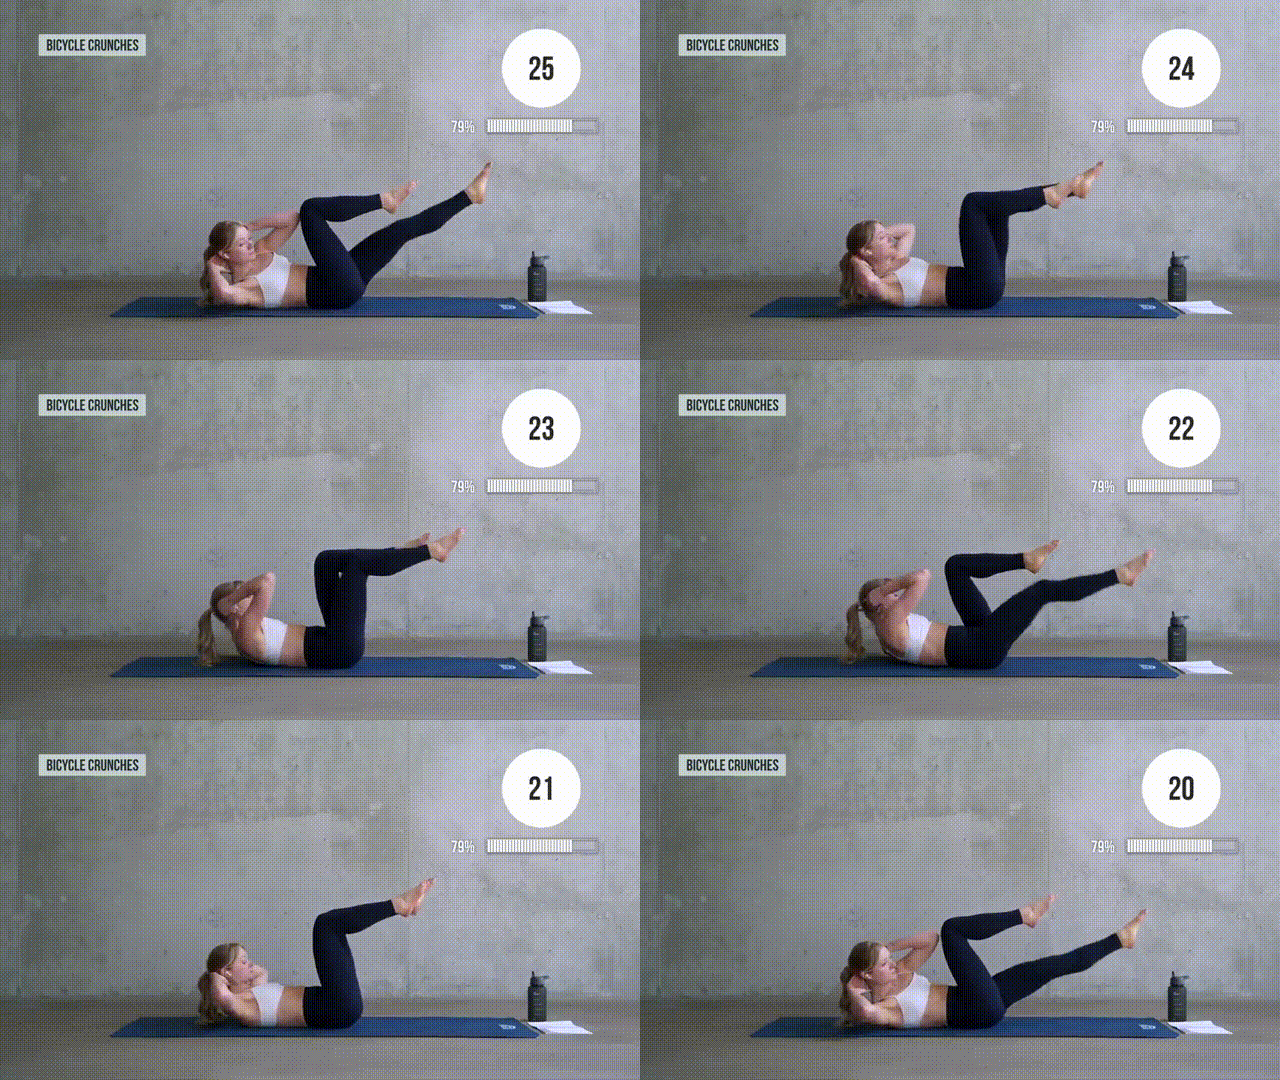
The last ab exercise in this calisthenics workout routine is the elbow-to-knee twist crunch. This one is great for oblique activation!
How to perform:
- Assume the starting position with your hands behind your head and elbows flared. Don’t pull your neck, though!
- Bend your knees and keep your calves parallel to the ground.
- Exhale as you extend your right leg.
- Twist your torso so that your right elbow touches your left knee.
- Inhale as you return.
- Repeating, alternating sides.
Challenge Rounds
Article Medically reviewed by
I’m fitness coach Ashley Castleberry, an NASM-certified personal trainer and nutritionist, as well as a coach on an established YouTube Channel with over 1 million followers. With certifications from major fitness brands, I specialize in athletic, HIIT, and strength training. Leveraging my experience coaching clients on lifestyle changes, I provide customized exercise and nutrition guidance to help people reach their fitness goals, whether that be weight loss, muscle gain or overall health improvement.
