Your glutes do a lot for you. The least you can do is give them 10 minutes.
This lower body Pilates workout uses the wall to hit your legs from every angle. We’re talking hip bridges, single-leg work, and ankle mobility all in one routine.
No fancy equipment needed — ankle weights are optional, so just grab a mat, find a wall, and give this Pilates legs workout a try. It’s the perfect Pilates routine at home when time is tight!
Download this free printable Workout Tracker! Plus receive weekly workout tips when you subscribe.

Hip Rolls

Let’s ease into this wall pilates leg workout with some hip rolls.
For this one, you’ll roll through “imprint” — that just means pressing your low back into the mat — and then up onto your shoulder blades.
If you tend to feel this in your low back instead of your glutes, try tilting your pelvis slightly so your hip bones move closer to your ribs. That little adjustment makes a big difference!
How to perform:
- Lay on your back with your legs hip-distance apart on the wall, ensuring your hips are directly underneath your knees. (Ankle weights are optional).
- Tilt your pelvis slightly so your hip bones come closer towards your ribs; this prevents you from arching your low back too much.
- Inhale, then exhale as you roll through “imprint” (bringing your low back closer to the mat).
- Continue pressing through your feet to roll up onto your shoulder blades.
- Inhale as you roll your spine back down to the starting position.
- Repeat for 5 reps.
Parallel Hip Lifts

Now you’re warmed up, so let’s pick up the pace with this pilates glute exercise.
You’ll bridge up, lower your hips until they’re just hovering over the mat, and then squeeze back up. The key here? Really focus on squeezing your glutes every time you come up to open up that hip joint.
How to perform:
- Keep your feet on the wall, parallel and hip-distance apart.
- Bridge your hips up.
- Lower your hips down until they are just hovering over the mat, then lift them back up.
- Squeeze your glutes each time you lift to open up the hip joint.
- Repeat for 10 reps.
Parallel Heel Lifts

Stay up in that bridge — don’t come down just yet!
For this pilates leg exercise, you’ll keep your hips lifted the entire time while lifting and lowering your heels off the wall. It’s great ankle mobility work AND isometric glute work all rolled into one.
How to perform:
- Stay lifted in the bridge position from the previous exercise.
- Keeping your hips lifted the entire time, lift your heels off the wall and lower them back down.
- Repeat for 10 reps.
V-Stance Hip Lifts

Time to switch things up with a new foot position. You’ll turn your feet out on the wall so they look like a “V.”
Leave a little space between your heels — they shouldn’t be touching. Then it’s the same hip lift you already know: drop to hover, lift back up.
Having trouble getting your glutes up? Scoot a little closer to the wall and that should help.
How to perform:
- Lower your hips to the floor and change your foot position on the wall: turn your feet out so they look like a “V”.
- Leave a little space between your heels; do not press them together. (If it’s hard to get your glutes up, scoot closer to the wall).
- Bridge your hips up.
- Drop your hips to hover, and then bring them back up.
- Repeat for 10 reps.
V-Stance Heel Lifts

Keep holding that V-stance bridge and get ready for more heel lifts.
You’ll really want to focus on staying lifted and steady through the rest of your body while your heels go up and down. It sounds simple, but you’ll feel the difference!
How to perform:
- Stay lifted in your V-stance bridge position.
- Keep the rest of your body lifted and steady as you lift your heels off the wall and lower them.
- Repeat for 10 reps.
Wide Parallel Hip Lifts

Take a quick breather here — you’ve earned it.
For this next move in the pilates legs and glutes series, you’ll spread your feet further apart on the wall and turn them back to parallel (think of the number “11”).
Then it’s back to bridging and dropping those hips to hover.
How to perform:
- Lower your hips for a quick break (scoot closer to the wall if needed).
- Separate your feet further apart on the wall and turn them back into a parallel position so they look like an “11”.
- Bridge your hips back up.
- Drop your hips to hover, and then bring them back up.
- Repeat for 10 reps.
Wide Parallel Heel Lifts

Same position, but now you’ll add the heel lifts while staying lifted.
Don’t forget to breathe — it’s easy to hold your breath during these! If you’re feeling any low back discomfort at this point, bring your knees in and give them a quick hug before moving on.
How to perform:
- Stay lifted in your wide parallel bridge position.
- Lift your heels off the wall and lower them back down, remembering to breathe.
- Repeat for 10 reps.
Wide V-Stance Hip Lifts

We’re bringing that turned-out foot position back, but this time in the wider stance.
You might notice this one hits the outer part of your glutes a bit more. That’s because those muscles are working overtime to keep your hips rotated out while you lift.
How to perform:
- Bring your legs back to the wide position on the wall, but this time turn your feet out into a “second position V”.
- Bridge your hips up.
- Drop your hips to hover, and then bring them back up.
- Repeat for 10 reps.
Wide V-Stance Heel Lifts

Last set of heel lifts in this position — you’ve got this!
Stay lifted, keep breathing, and lift those heels for 10 reps. After this one, bring your knees in and rock back and forth to give your body a little reset.
How to perform:
- Stay lifted in your wide V-stance bridge position.
- Lift your heels off the wall and lower them back down.
- Repeat for 10 reps.
Single Leg Hip Lifts

Here’s where this mat pilates leg workout really levels up.
You’ll bridge up, bring one leg into tabletop, and do your hip lifts on just one side. Fair warning — it’s a lot more work for your pelvis to stay level, so don’t be surprised if you feel wobbly at first!
If you have ankle weights on, this is where you’ll really start to feel them.
How to perform:
- Place your feet back on the wall, parallel and hip-distance apart.
- Bridge your hips up and bring one leg off the wall into a tabletop position (knee bent).
- Drop your hips to hover, and lift them back up.
- Work hard to keep your pelvis level the entire time.
- Repeat for 10 reps.
Single Leg Heel Lifts

Keep that one leg in tabletop and add your heel lifts.
Try to stay both lifted and level the whole time. Once you finish one side, switch legs and repeat the single leg hip lifts AND the heel lifts on the other side.
How to perform:
- Stay lifted in your single-leg bridge with your working leg still in tabletop.
- Lift the heel of the foot that is planted on the wall, then lower it.
- Repeat for 10 reps.
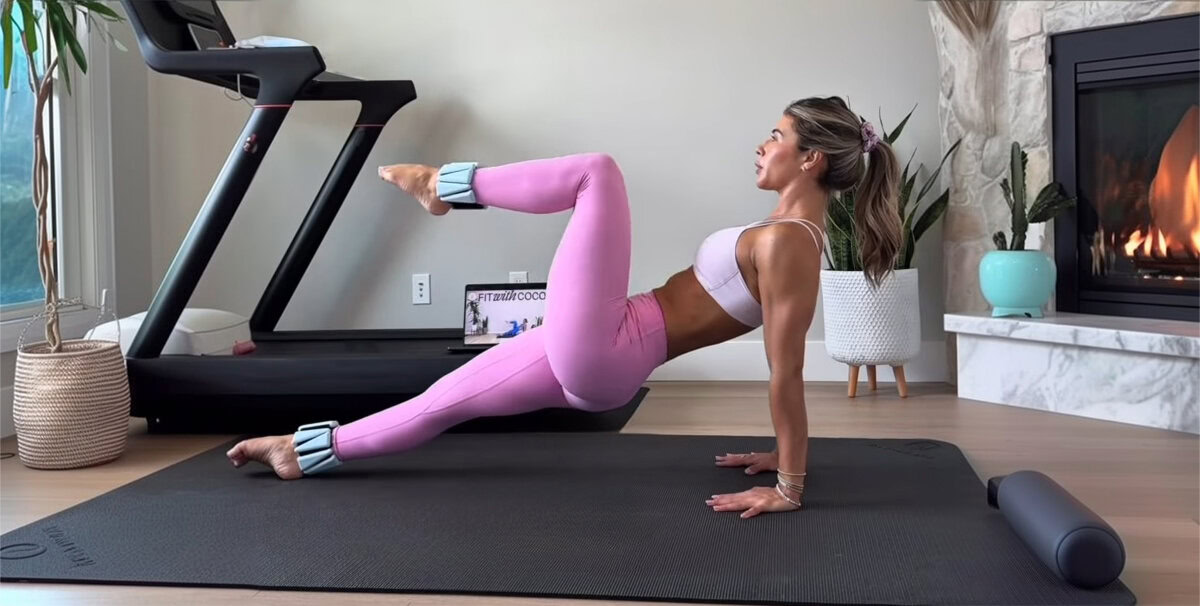
Single Leg Extensions

For this pilates leg workout at home, you’ll extend your tabletop leg straight out toward the wall and bring it back.
The focus here is on keeping your pelvis and hip bones perfectly level — point that foot and feel the length through your leg. If this feels uncomfortable on the wall, you can always take your feet to the floor and bridge from there.
How to perform:
- Place both feet on the wall and bridge your hips back up.
- Bring one leg into a tabletop position.
- Extend that leg out towards the wall, pointing the foot and feeling length through the leg.
- Keep your pelvis and hip bones perfectly level.
- Bring the leg back to the tabletop position.
- Repeat for 10 reps.
Single Leg Tabletop Reaches

This one’s a combo move, so it takes a bit of coordination.
You’ll go from tabletop, extend your leg up toward the ceiling, back to tabletop, then reach it out toward the wall — all while staying bridged. You’ll do 5 reps on each leg.
How to perform:
- Stay bridged up with one leg in tabletop.
- Extend your leg straight up.
- Bring it back to tabletop.
- Extend (reach) the leg out towards the wall.
- Bring it back to tabletop.
- Repeat this sequence 5 times on the first leg.
Single Leg Circles

Last pilates leg exercise before the cool down!
You’ll extend one leg straight up, point your foot, and draw circles in the air. Start with small circles to protect your core, and you can make them bigger as you get stronger and repeat this routine.
The whole time, try to keep your hip bones at the same height — that’s the real challenge here.
How to perform:
- Place both feet on the wall and bridge up.
- Extend one leg straight up towards the ceiling, pointing the foot.
- Press through the foot on the wall to stay lifted through your glutes.
- Bring the extended leg slightly back, then draw a circle in the air with it. (Start with small circles to protect your core, and make them bigger as you progress).
- Keep your hip bones at the exact same height the entire time.
- Repeat for 5 circles on the first leg.
Cat Stretch (Cool Down)

You made it through the hard part! Now it’s time to stretch it out.
You’ll come into a hands-and-knees position and move between flexing your spine (rounding your back up) and extending it (letting your stomach drop). This feels amazing after all that pilates lower body work.
How to perform:
- Sit up and come into a quadruped position (hands directly underneath your shoulders, knees directly underneath your hips).
- Take a breath in.
- Exhale and flex your spine upward (rounding your back) to feel a stretch through your back.
- Take another breath in.
- Exhale and let your stomach hang down, extending your spine to feel a stretch through the front of your body.
- Repeat the flexion and extension.
Shell Stretch (Cool Down)

To wrap up this pilates routine at home, sit your hips back toward your heels and reach your arms forward.
Round your spine and just hang out here for a bit — your low back will thank you. This would also be a great workout to pair with an ab routine if you want to keep going!
How to perform:
- From your quadruped position, sit your hips back toward your heels.
- Reach your arms forward on the mat.
- Round your spine and sit in this position to stretch the lower back.

Article Medically reviewed by
I’m fitness coach Ashley Castleberry, an NASM-certified personal trainer and nutritionist, as well as a coach on an established YouTube Channel with over 1 million followers. With certifications from major fitness brands, I specialize in athletic, HIIT, and strength training. Leveraging my experience coaching clients on lifestyle changes, I provide customized exercise and nutrition guidance to help people reach their fitness goals, whether that be weight loss, muscle gain or overall health improvement.
