Your side muscles work harder than you think – they’re constantly helping you twist, bend, and stay balanced throughout your day.
This oblique workout for women targets those important core muscles that often get overlooked. These moves will help strengthen your sides and improve how your whole midsection feels and functions.
No equipment needed. Just 10 minutes and you’ll give these hardworking muscles the attention they deserve!
Save This On Pinterest!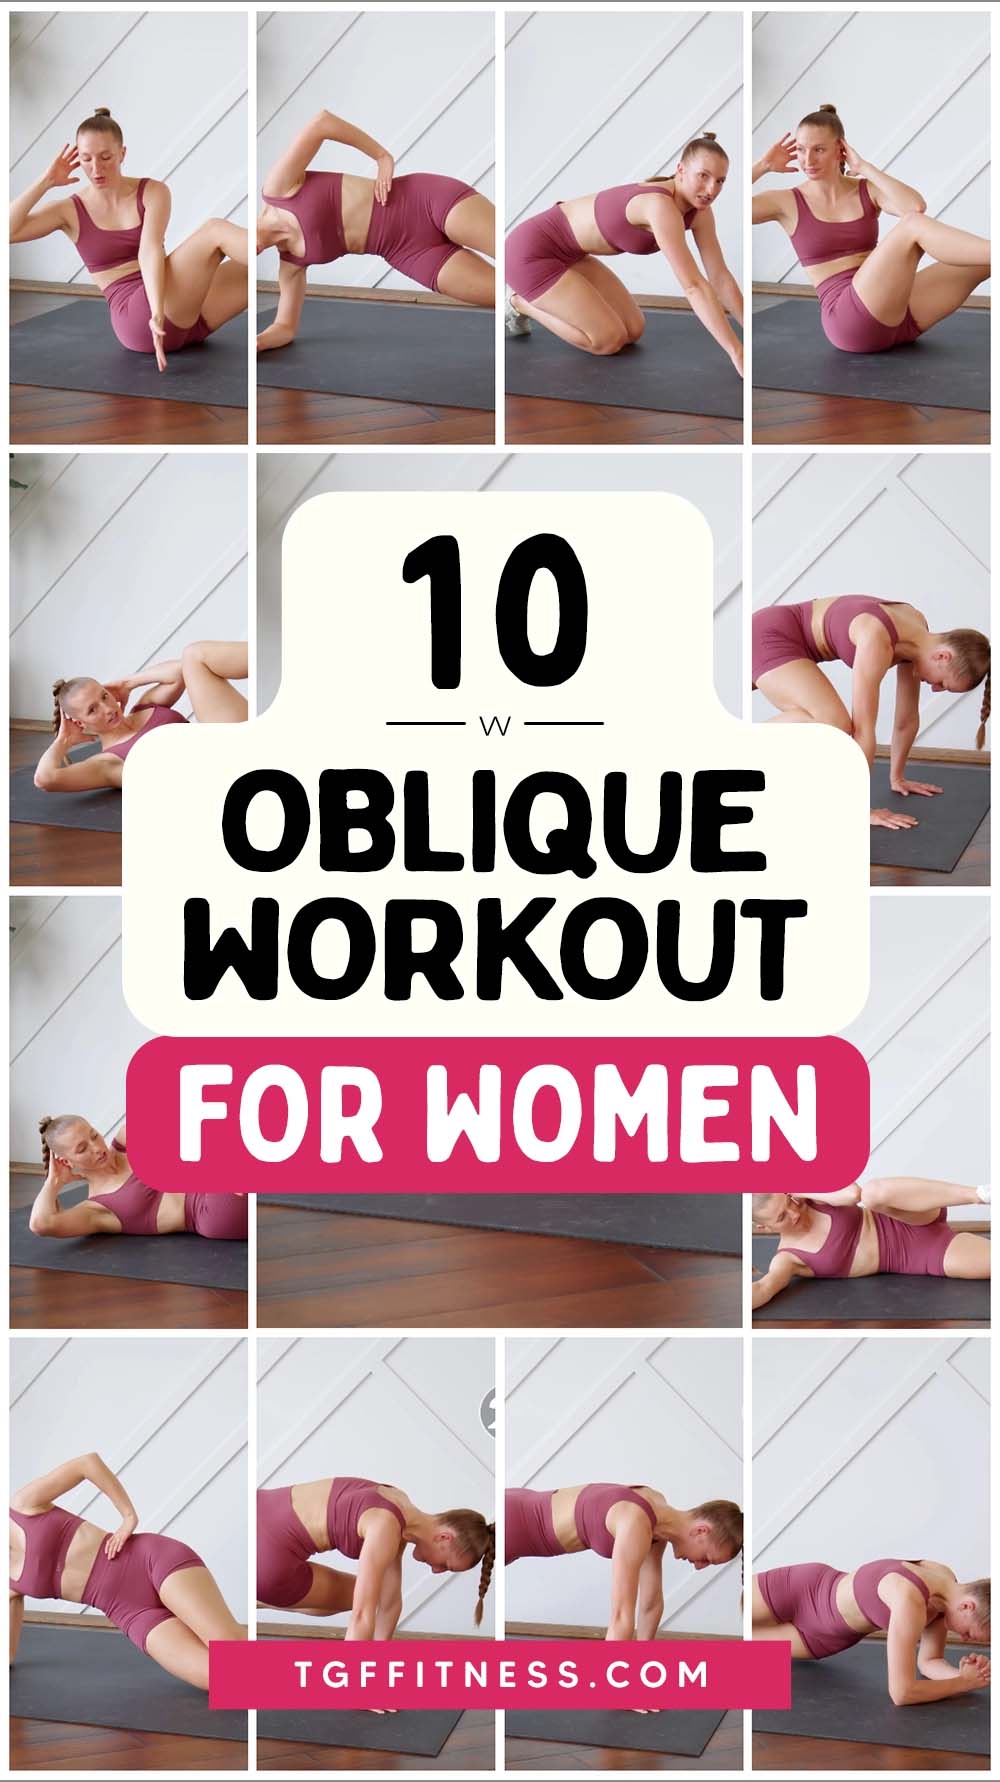
Side-Lying Tuck (One Side)
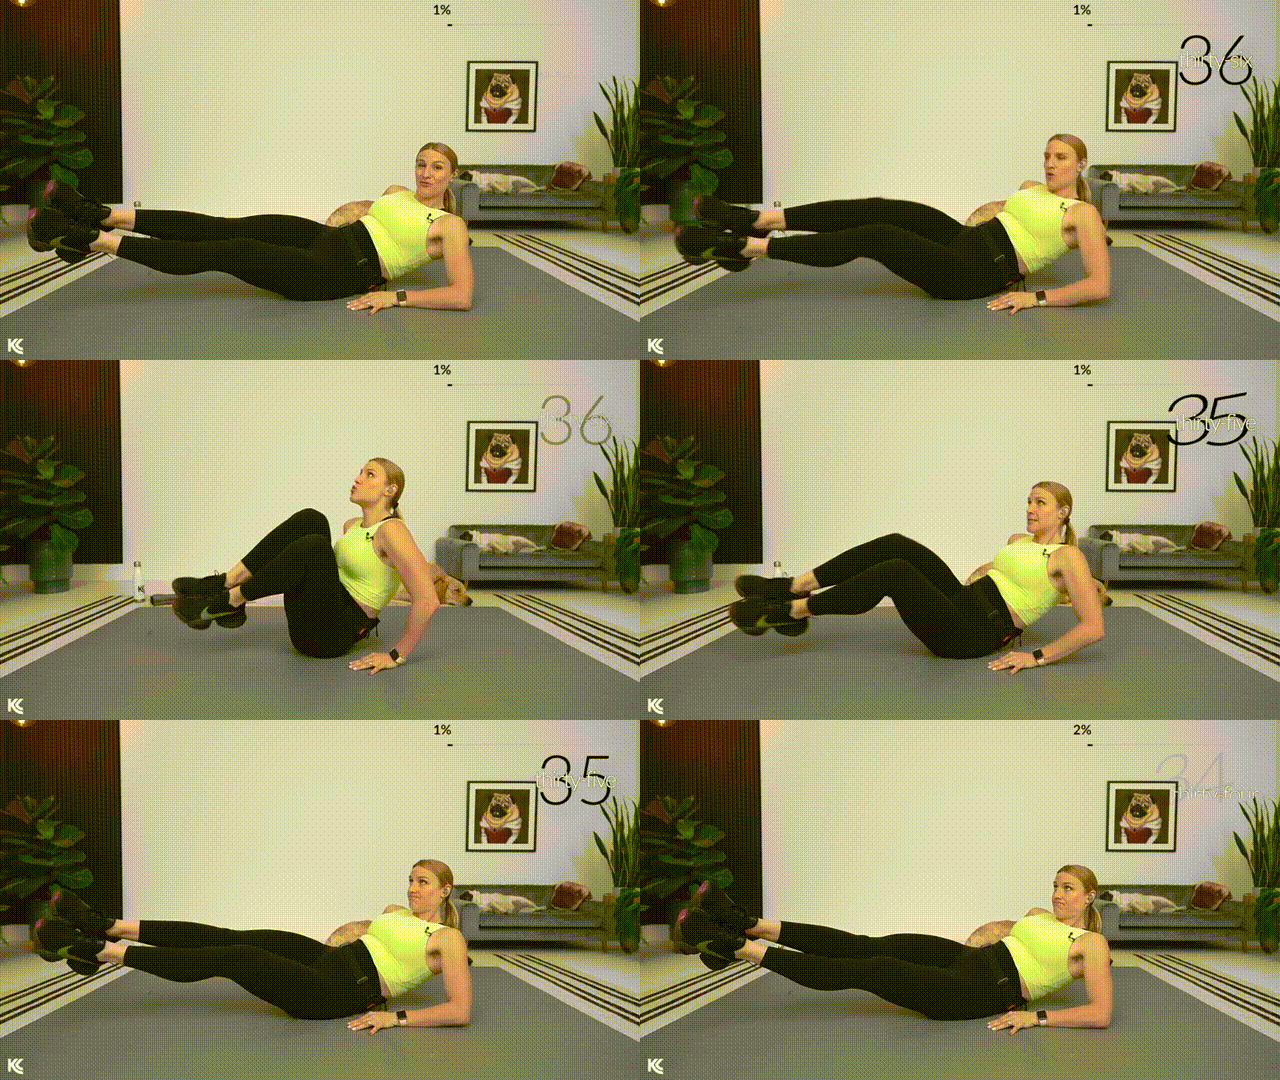
Let’s start with a move that targets one side of your obliques at a time.
You’ll work at a slight angle here to really focus on those side muscles – don’t forget to let those abs lengthen on the extension.
How to perform:
- Start lying on your side, propped up on your forearm, with your legs extended straight out.
- The legs are held slightly elevated off the ground.
- Exhale as you simultaneously bend your knees and crunch your torso, bringing your knees toward your chest and elbow.
- Extend your legs and torso back out, allowing your abs to lengthen.
- Maintain a slight angle to focus on the core side that is facing up.
Side-Lying Tuck (Switch Sides)
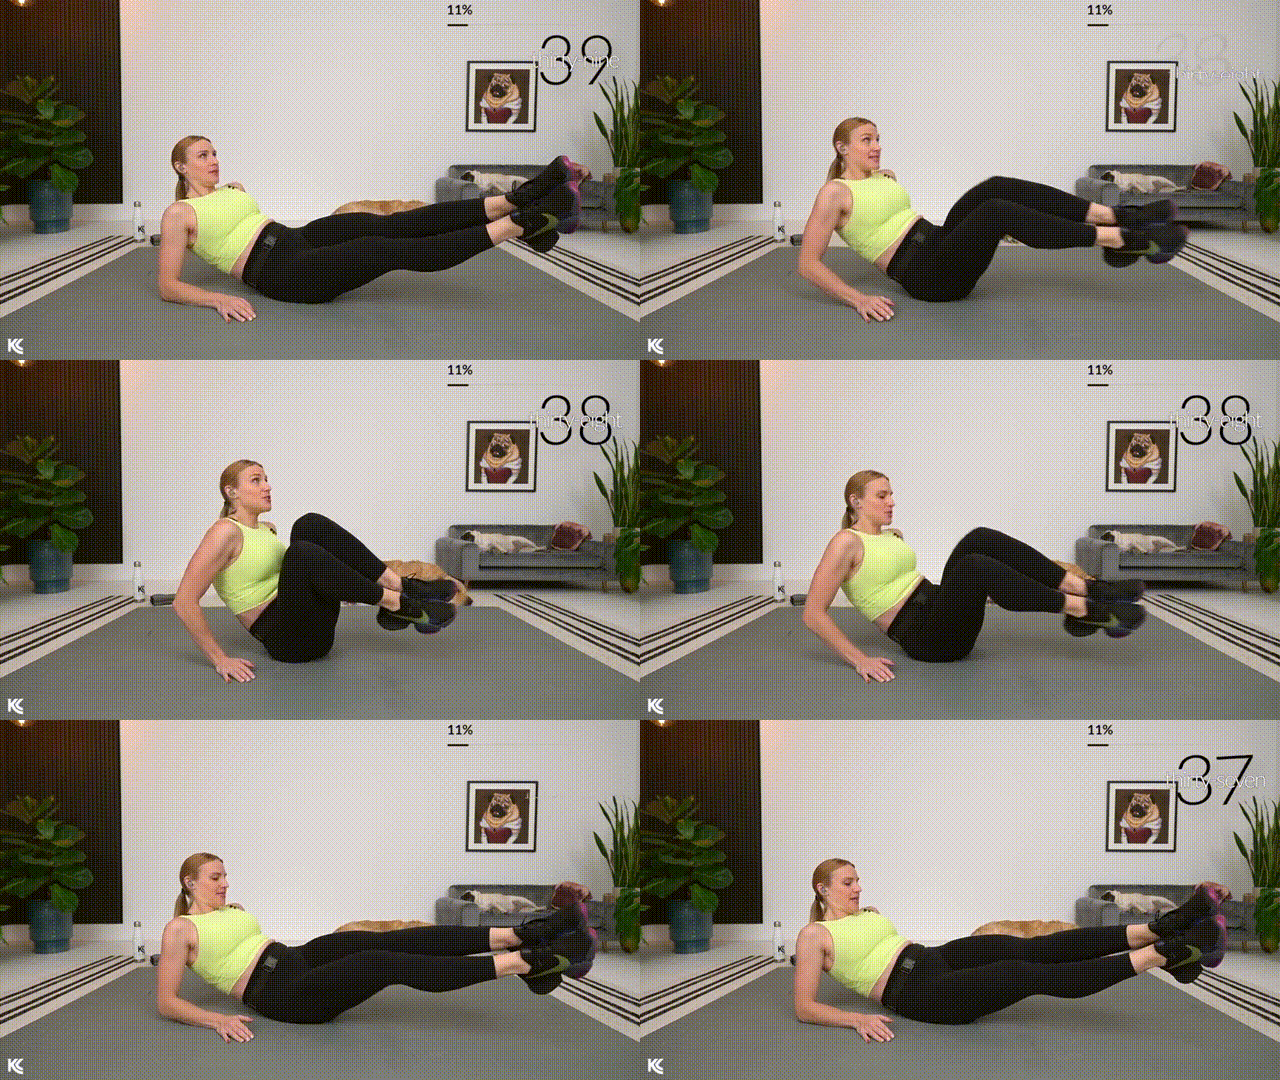
Now flip over to the other side to keep things balanced.
If you’re struggling to maintain good form, remember that modification is there for a reason – use it whenever you need to.
How to perform:
- Flip over to the opposite side, maintaining the same starting position: propped up on your forearm with legs extended straight out.
- Exhale as you simultaneously bend your knees and crunch your torso, bringing your knees toward your chest.
- Extend your legs and torso back out to a full extension.
Russian Twist
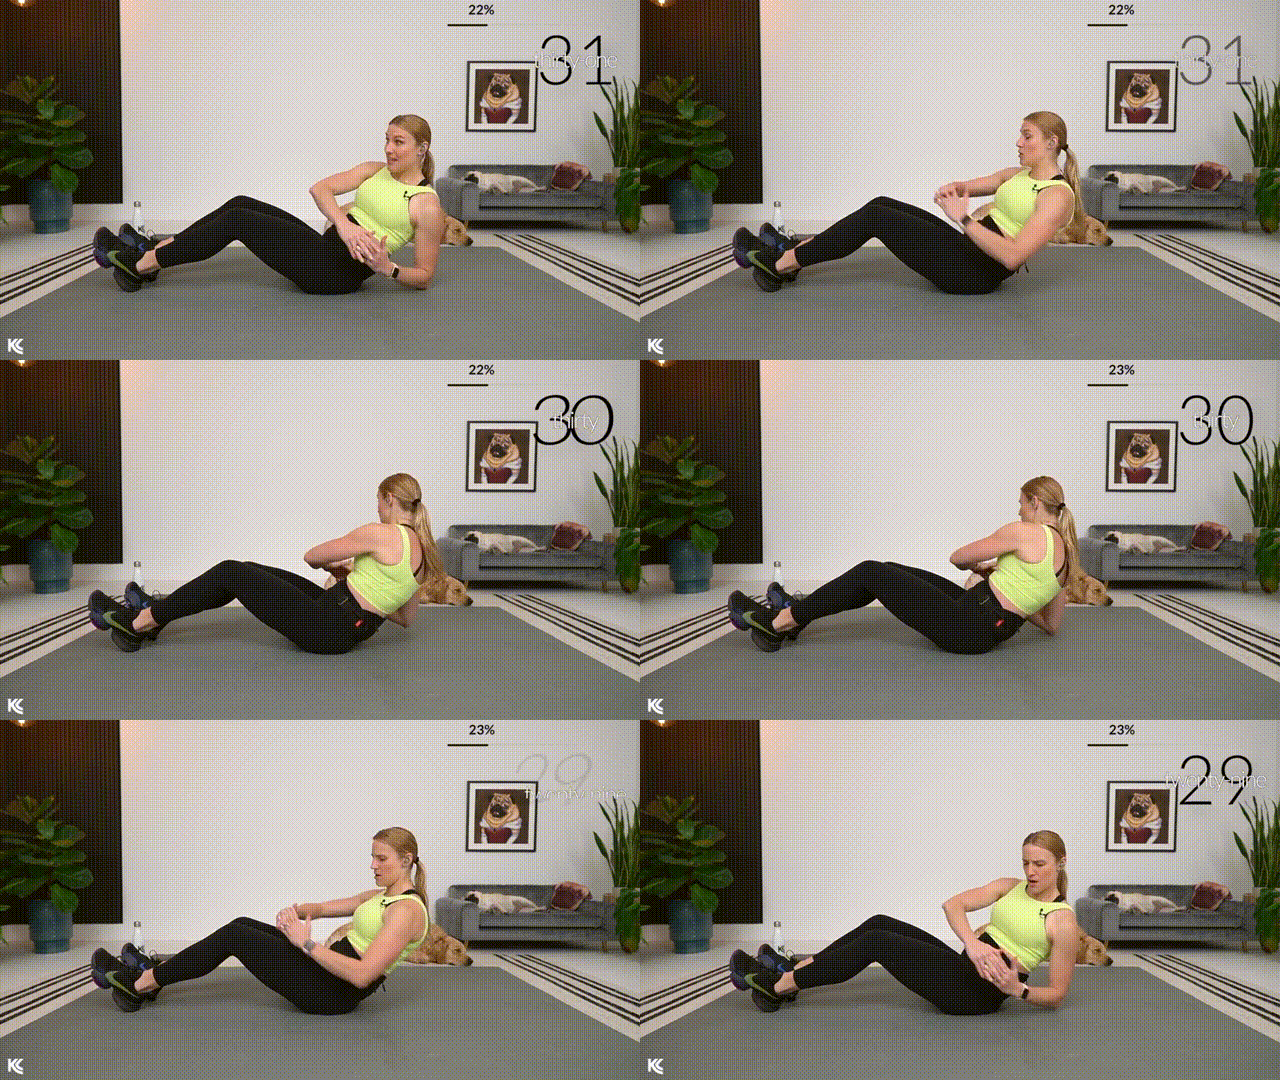
Your oblique workout won’t be complete without some dedicated twisting action.
You’ll lean back and twist from side to side – the deeper you go, the more you’ll feel it, but keep that form solid.
How to perform:
- Sit on your mat with your knees bent and feet down (flat on the floor).
- Hold your hands together in front of your chest.
- Lower your back just a bit to engage your core.
- Twist your torso from side to side, tapping your hands or elbows to the floor next to your hips on each side.
- The deeper you lower your back, the more you will feel the tension, but maintain good form.
- Modification: Simply sit up a little bit farther.
Side-Lying V-Crunch (One Side)
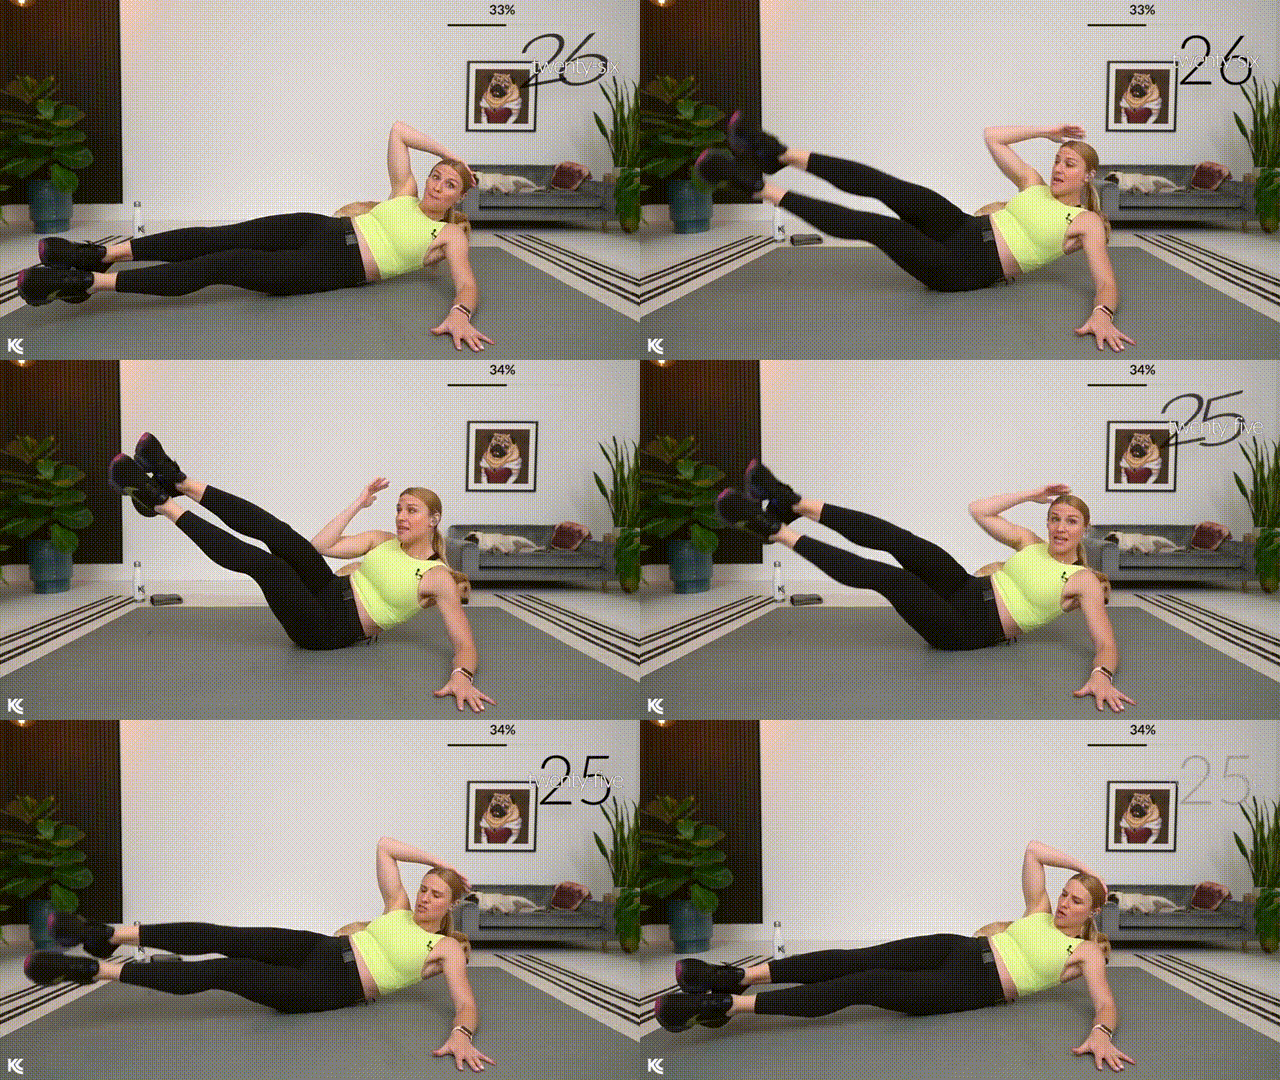
Here’s where things get challenging.
This move brings your upper and lower body together in a “V” shape – it takes some coordination to get this one right, though!
How to perform:
- Lie down on one side, placing the hand of the bottom arm behind your head.
- Extend your legs straight out, stacking one on top of the other.
- Crunch up and in, lifting your torso and legs simultaneously toward the ceiling in a “V” shape.
- Lower your body back down to the starting position with control.
Side-Lying V-Crunch (Switch Sides)
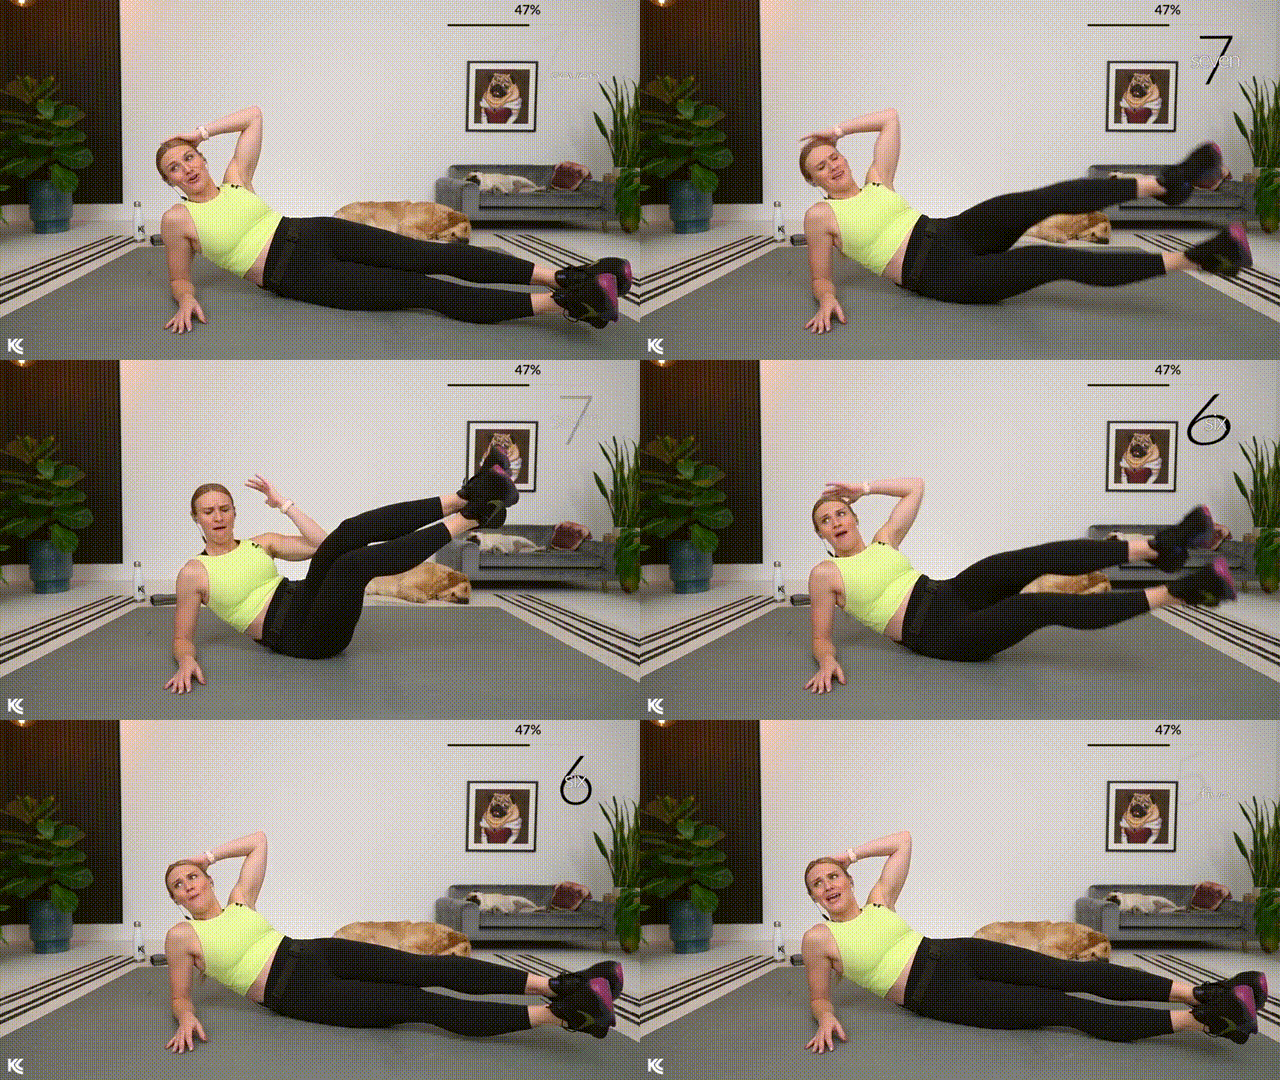
Time to switch sides and tackle the other oblique.
By now you’re probably thinking “this is harder than it looks” – and you’d be right! That’s exactly what makes it so effective.
How to perform:
- Flip over to the opposite side and set up in the same starting position (lying on your side, hand of the bottom arm behind your head, legs straight).
- Lift your torso and legs at the same time, bringing them together to form a “V” shape.
- Return to the starting position.
Side Plank Hip Drops (One Side)
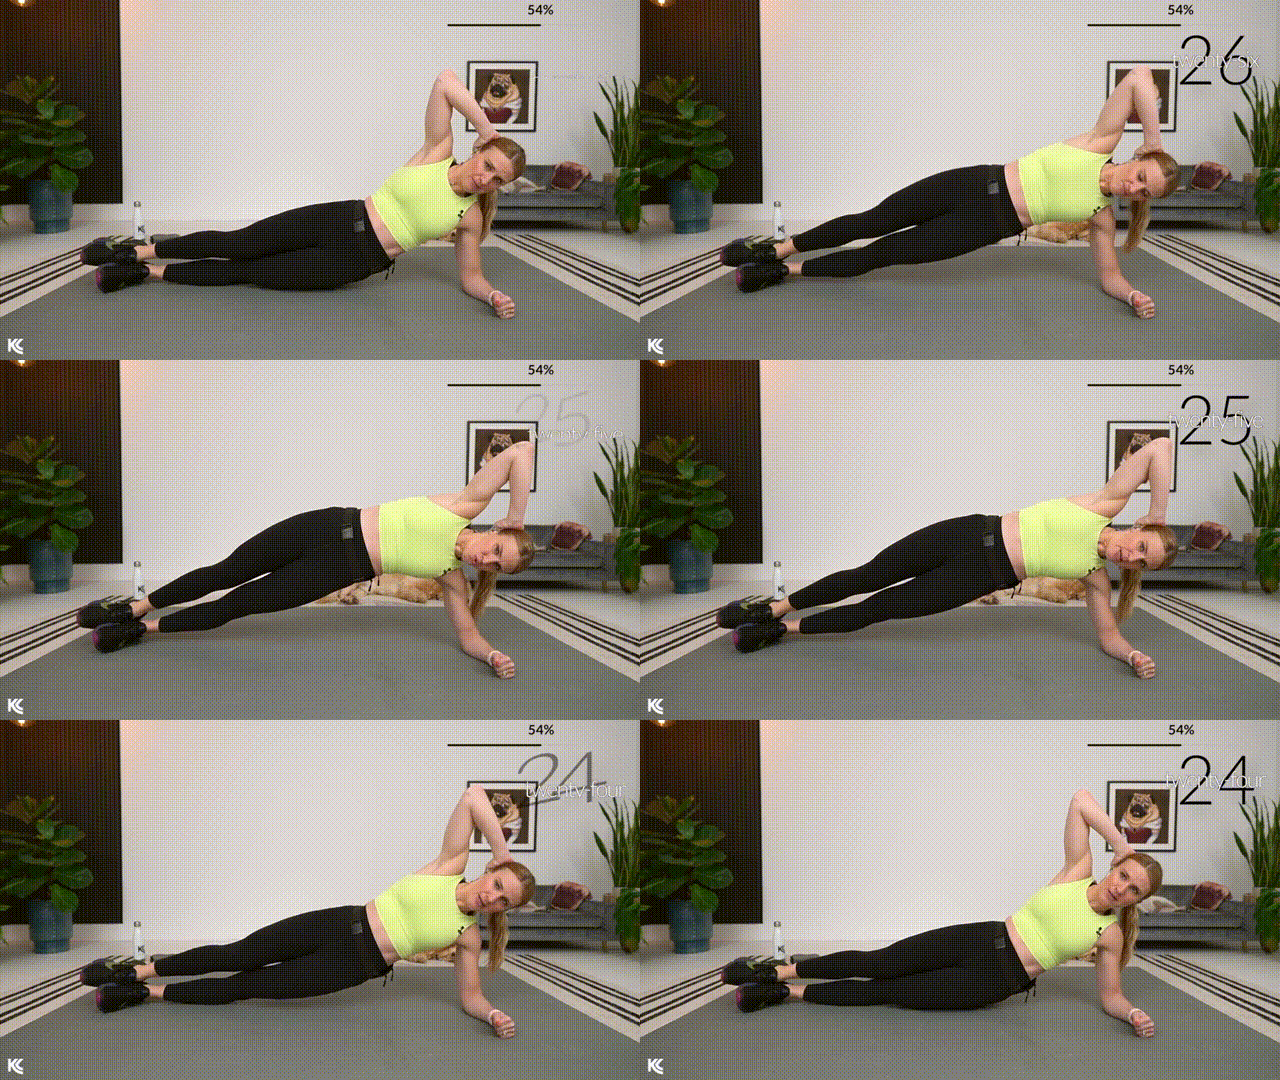
Now we’re adding movement to your side plank game.
You’ll drive those hips up toward the ceiling and back down – if holding a full side plank feels too challenging, that knee modification is your friend.
How to perform:
- Get into a side plank position, supporting your body weight on your forearm and the side of your foot.
- Ensure your body is long and strong, forming a straight line from your head to your feet.
- Drive your hips up toward the ceiling, then lower them to tap the ground.
- Exhale as you drive the hips up, squeezing the legs and glutes.
Side Plank Hip Drops (Switch Sides)
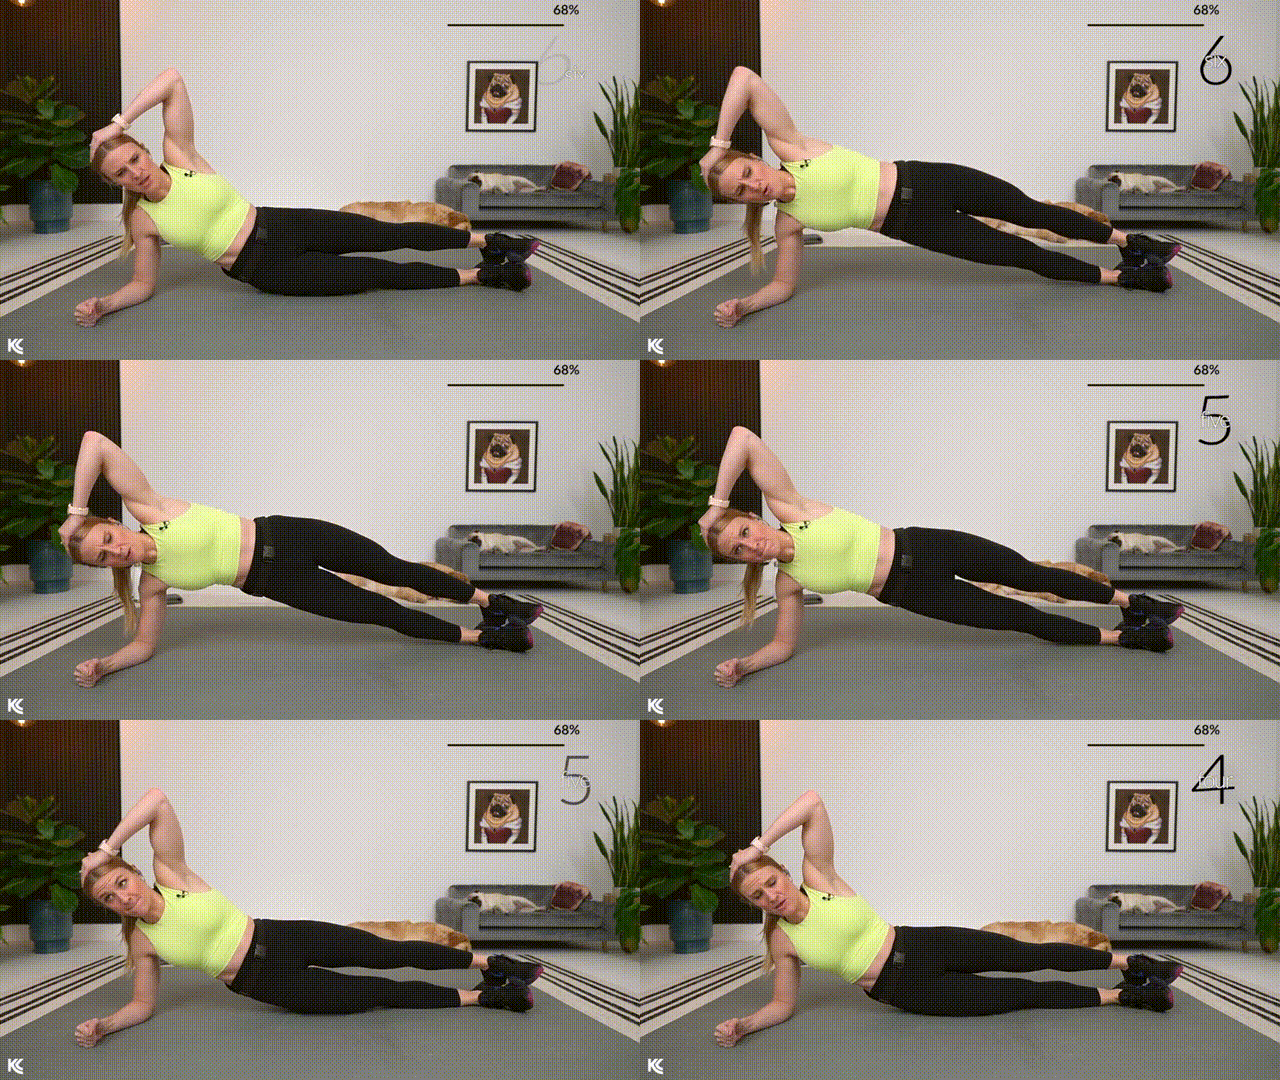
Switch to the other side and keep that energy going.
Remember to squeeze those legs and glutes as you drive up – your obliques will definitely feel this one working.
How to perform:
- Switch to the opposite side and set up your side plank on your forearm.
- Raise your hips to a strong plank position.
- Drop the hip down toward the ground and squeeze to raise it back up.
- Remember to exhale as you drive the hips up.
Forearm Plank Spider-Man
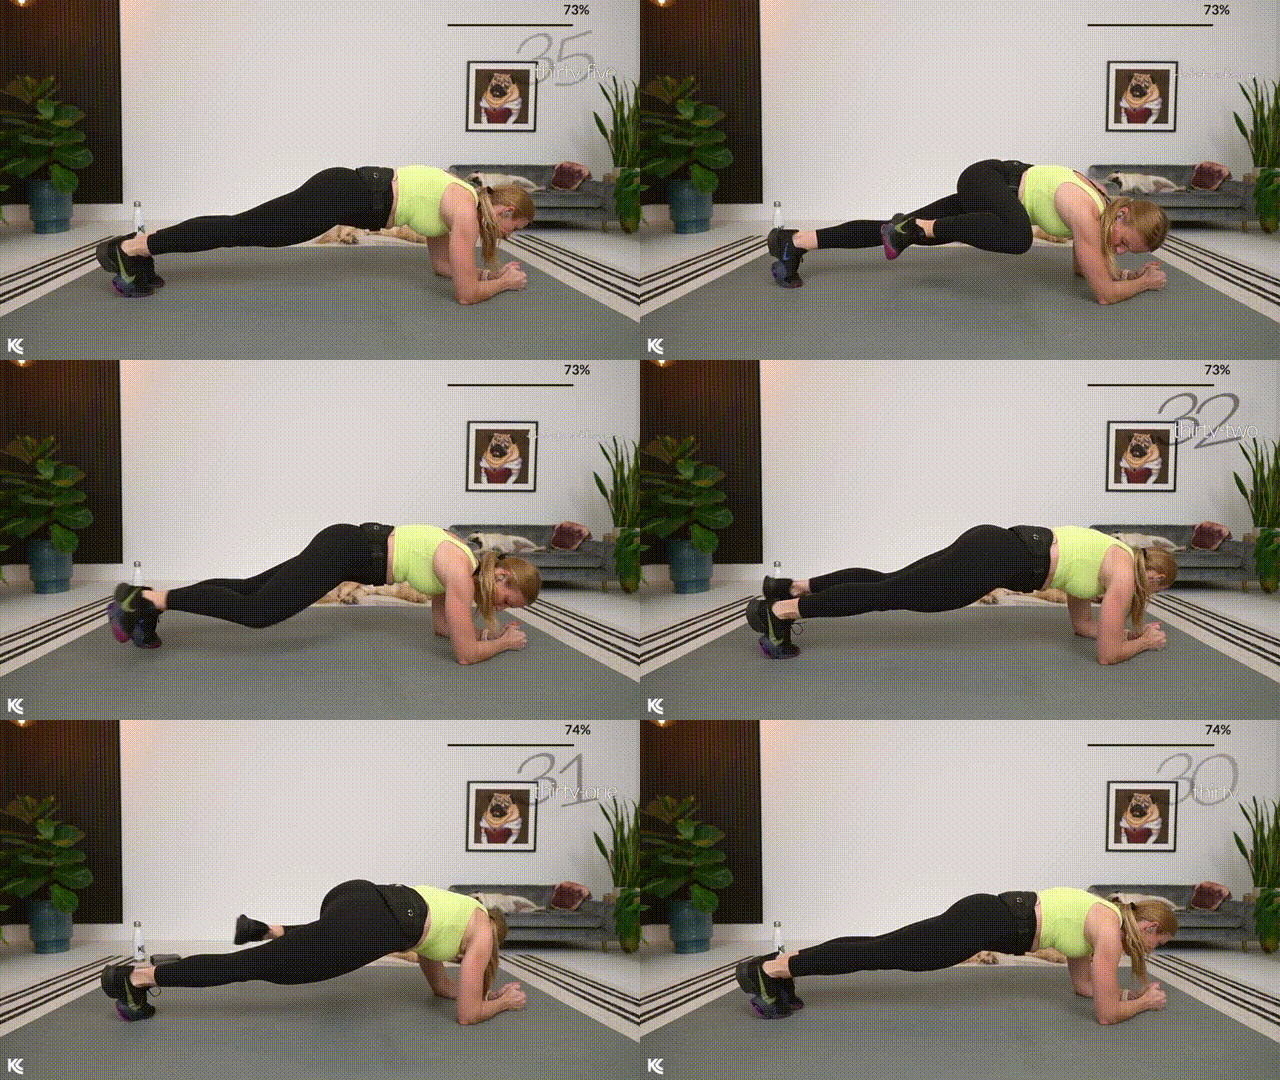
This exercise combines the stability challenge of a plank with targeted oblique work.
You’ll bring your knee to your elbow while maintaining that strong plank position – it takes coordination, but that’s what makes it effective.
How to perform:
- Start in a forearm plank position, with your elbows directly under your shoulders and your body forming a straight line.
- Bring your right knee out to the side toward your right elbow.
- Return the right leg to the plank position, and repeat on the opposite side (left knee to left elbow).
- Exhale as you drive the knee in toward the elbow.
- Keep your belly button pulled in toward your spine to maintain a strong plank.
Crunch Heel Tap to Knee Pull
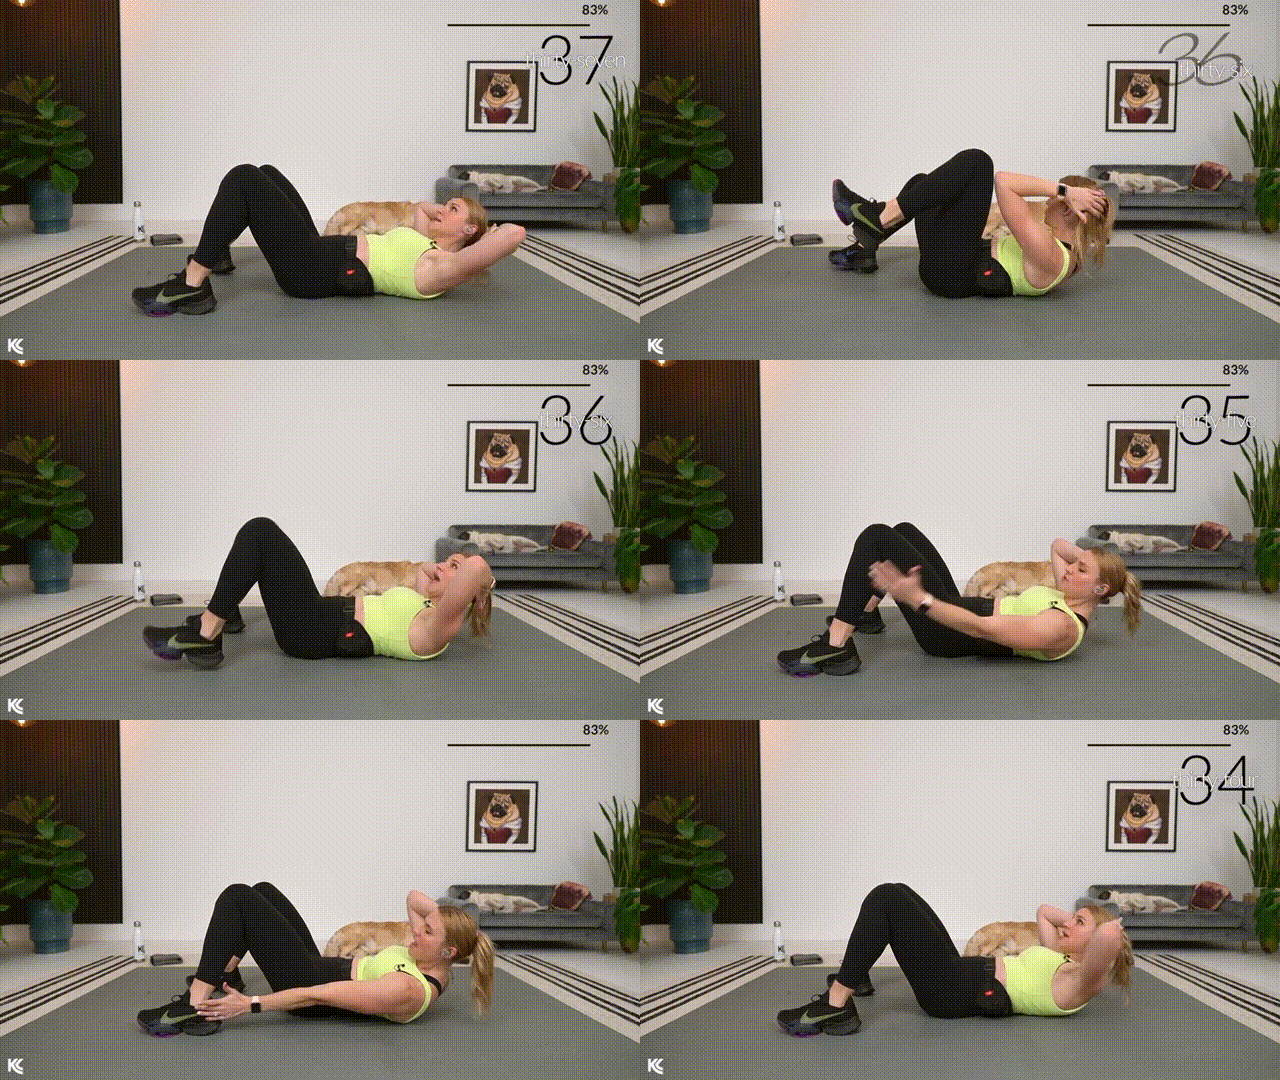
Here’s a two-part move that keeps your core constantly engaged.
You’ll tap your heel out, then immediately pull that knee back in – your abs can’t catch a break with this one.
How to perform:
- Lie on your back, with your hands gently behind your head.
- Crunch up, keeping your shoulder blades off the mat throughout the exercise.
- Extend one leg to tap the heel toward the ground.
- Immediately pull that knee in toward the same-side elbow.
- Repeat the tap and pull motion on the same side for the duration of the set.
Crunch Heel Tap to Knee Pull (Switch Sides)
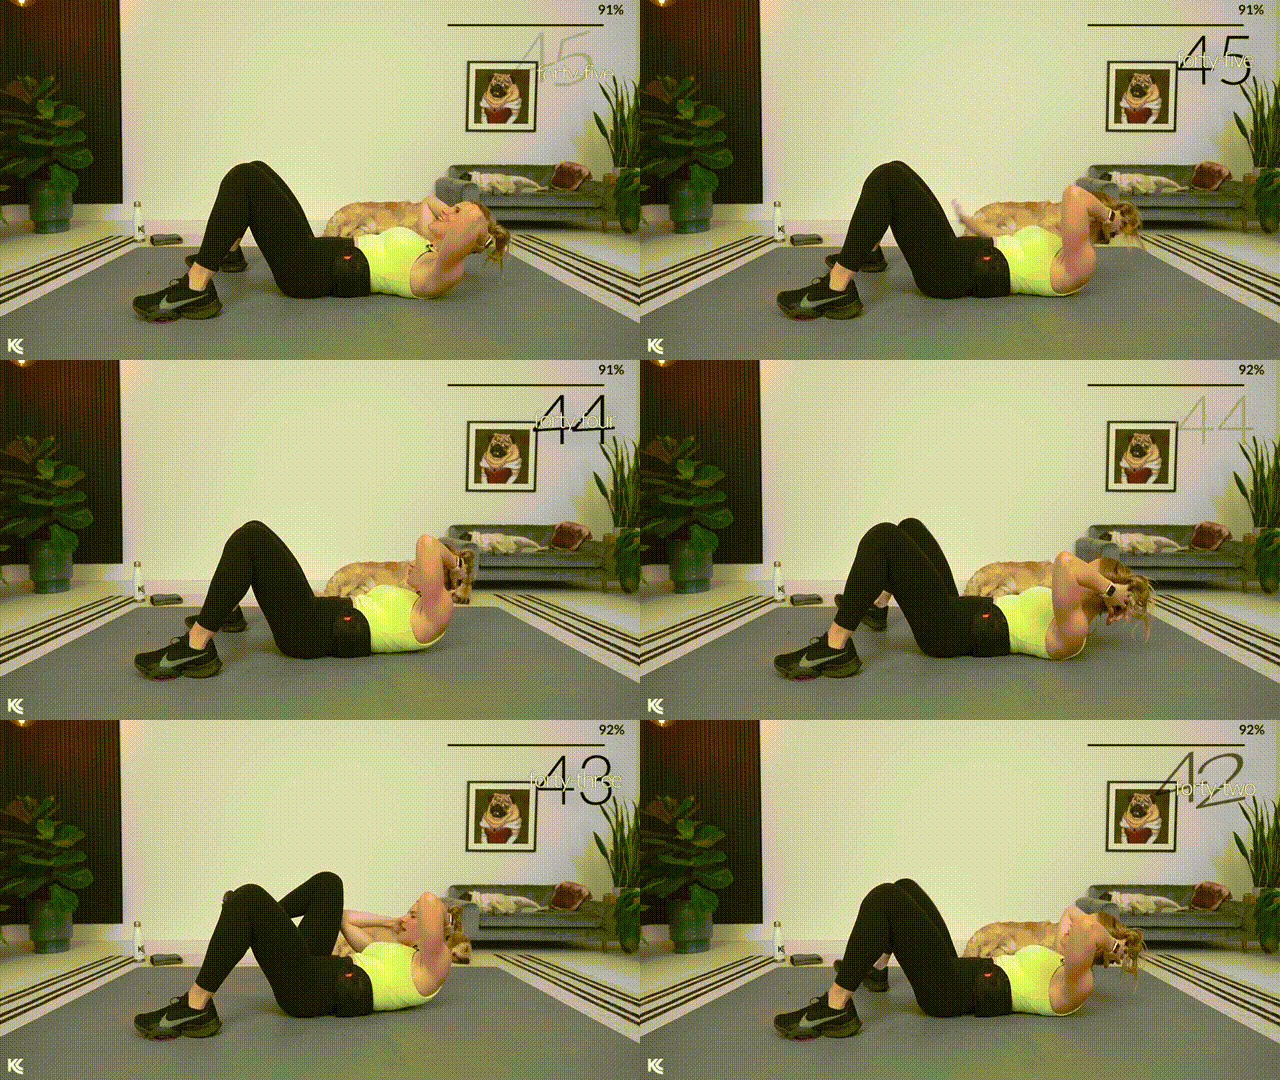
Last exercise, so finish strong on the other side!
Keep those shoulder blades up off the mat as you tap and pull – this is going to be one of those workouts you’ll remember tomorrow.
How to perform:
- Continue lying on your back, with your hands gently behind your head and shoulder blades elevated.
- Switch the motion to the opposite side.
- Extend the leg to tap the heel out, then immediately pull the knee in toward the elbow.
- Exhale as you tap and pull the knee to maintain the core contraction.

Article Medically reviewed by
I’m fitness coach Ashley Castleberry, an NASM-certified personal trainer and nutritionist, as well as a coach on an established YouTube Channel with over 1 million followers. With certifications from major fitness brands, I specialize in athletic, HIIT, and strength training. Leveraging my experience coaching clients on lifestyle changes, I provide customized exercise and nutrition guidance to help people reach their fitness goals, whether that be weight loss, muscle gain or overall health improvement.
