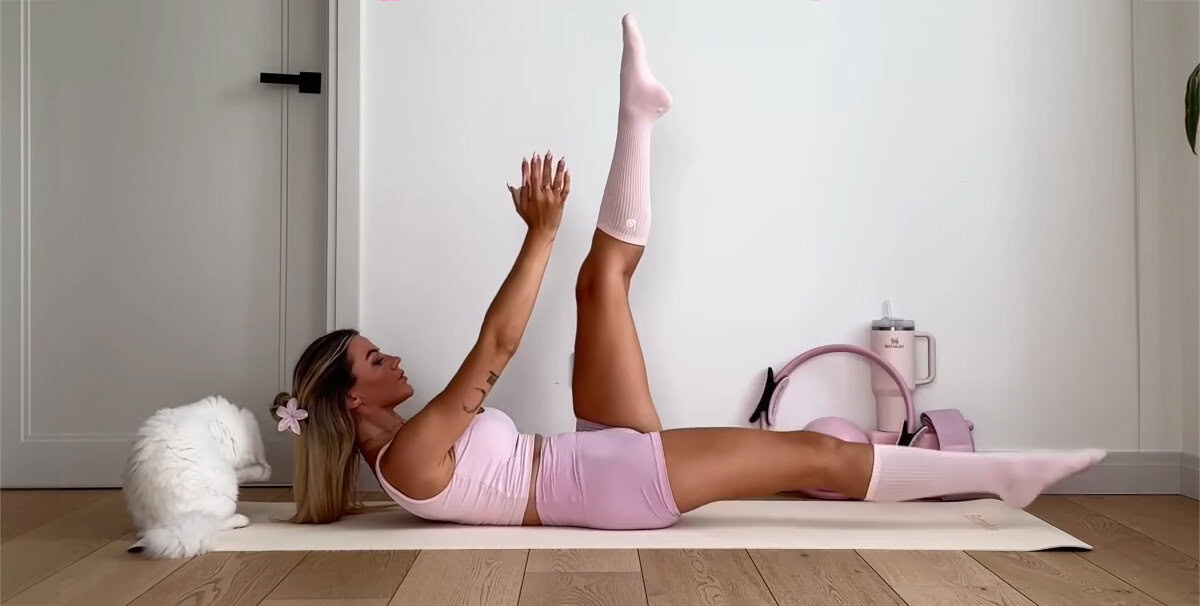
Maybe your lower back can’t handle another round of floor crunches.
Perhaps you’re tired of the same old ab routine that leaves you feeling strain in all the wrong places.
And that’s okay!
This wall pilates ab workout gives you the support you need while still delivering serious core work. You’ll use the wall as your workout partner to help with proper form and stability.
Ready to try something different?
AB Prep
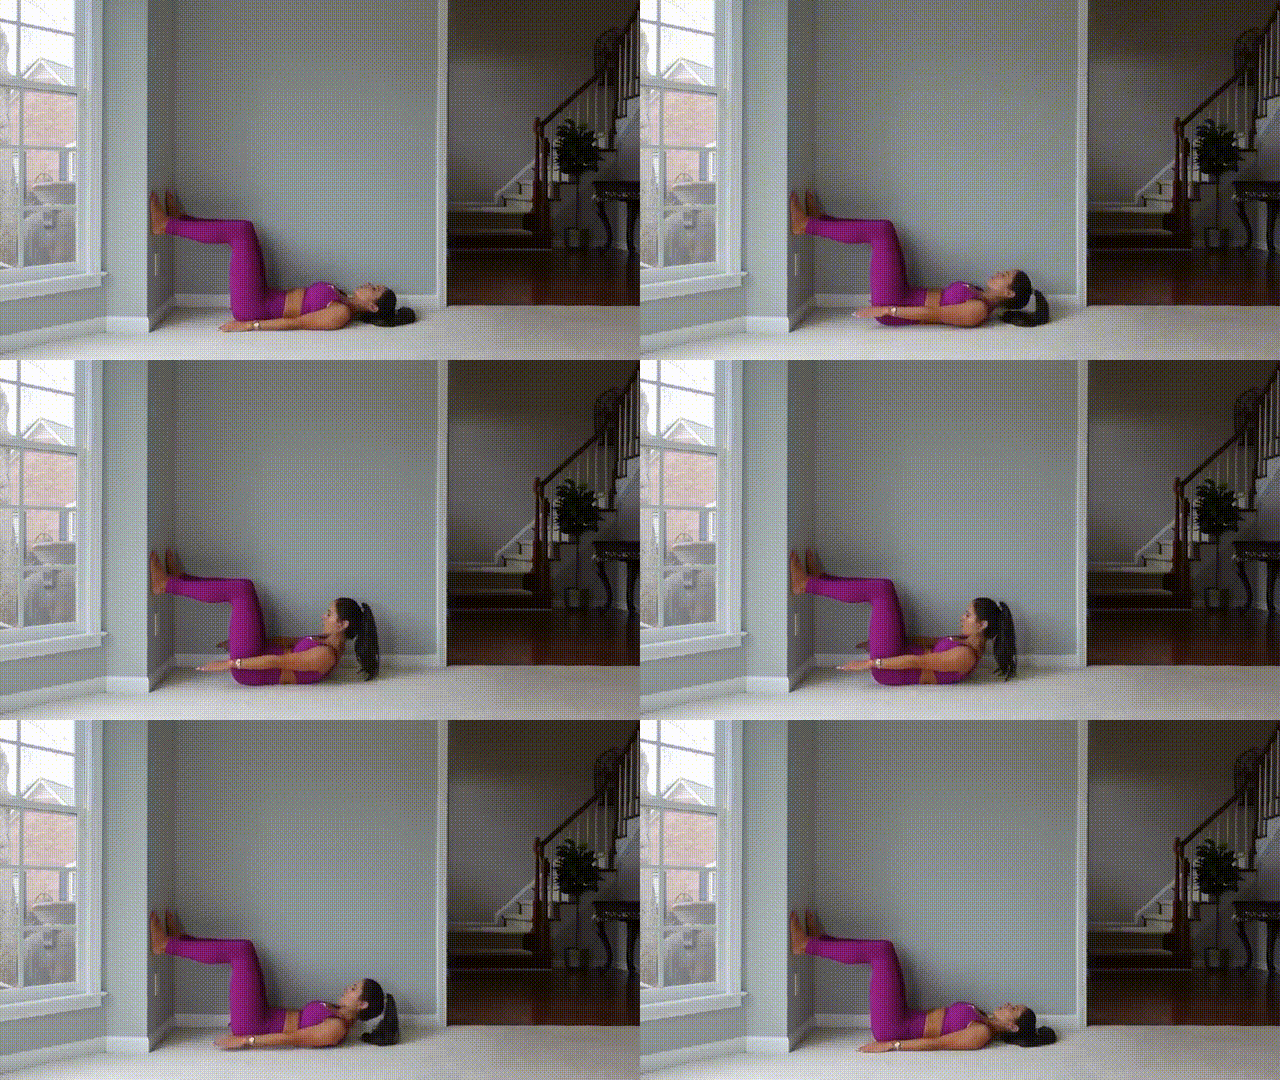
We’re starting simple here with a foundational move that’ll teach you proper form.
You’ll get comfortable with the wall setup while learning to connect your breath with movement – don’t worry if it feels awkward at first!
How to perform:
- Lie on your back, placing your feet against the wall, about a hip distance apart.
- Tilt your pelvis back to get an imprinted position (low back against or close to the floor).
- Exhale as you flex up (curl up) and lift your shoulders.
- Inhale as you lower back down.
- Try to look forward with your eyes, not up.
- Do not let your head lag behind as you flex up.
AB Prep with Reach (Obliques)
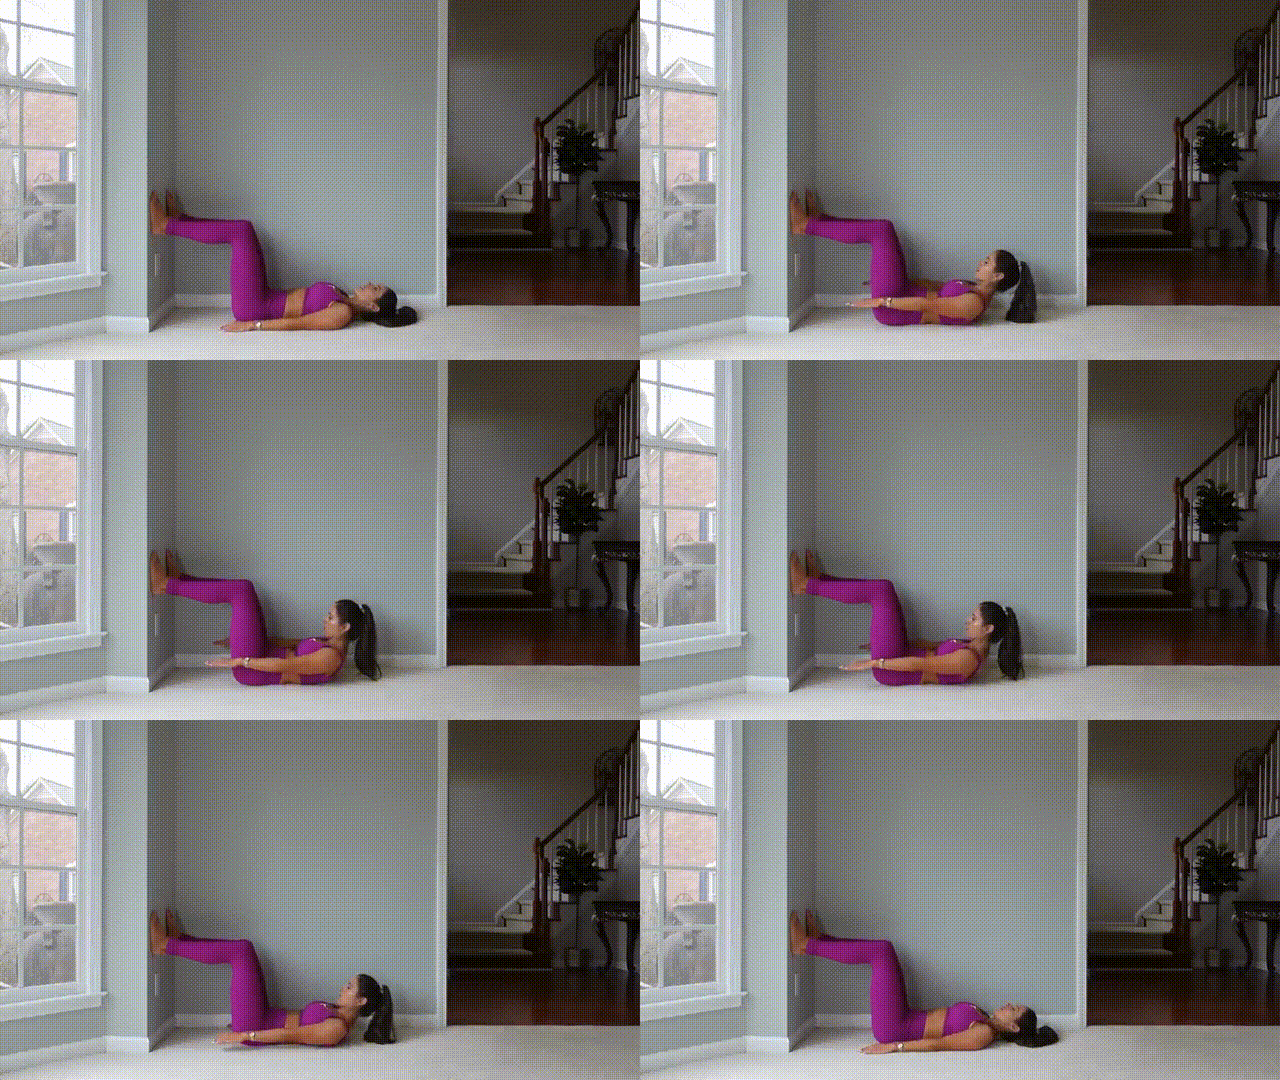
Now we’re adding a little twist to that basic prep. You’ll flex up and reach side to side to work those obliques.
Keep the reaches small and controlled – this isn’t about how far you can go, it’s about quality movement.
How to perform:
- Start in the flexed up (curled up) position from the AB Prep.
- Reach right and left to work the side bend (obliques).
- Come back down to the starting position.
- Keep the movement steady and stable, as the reach does not need to be big.
The Hundreds (Alternating Arms)
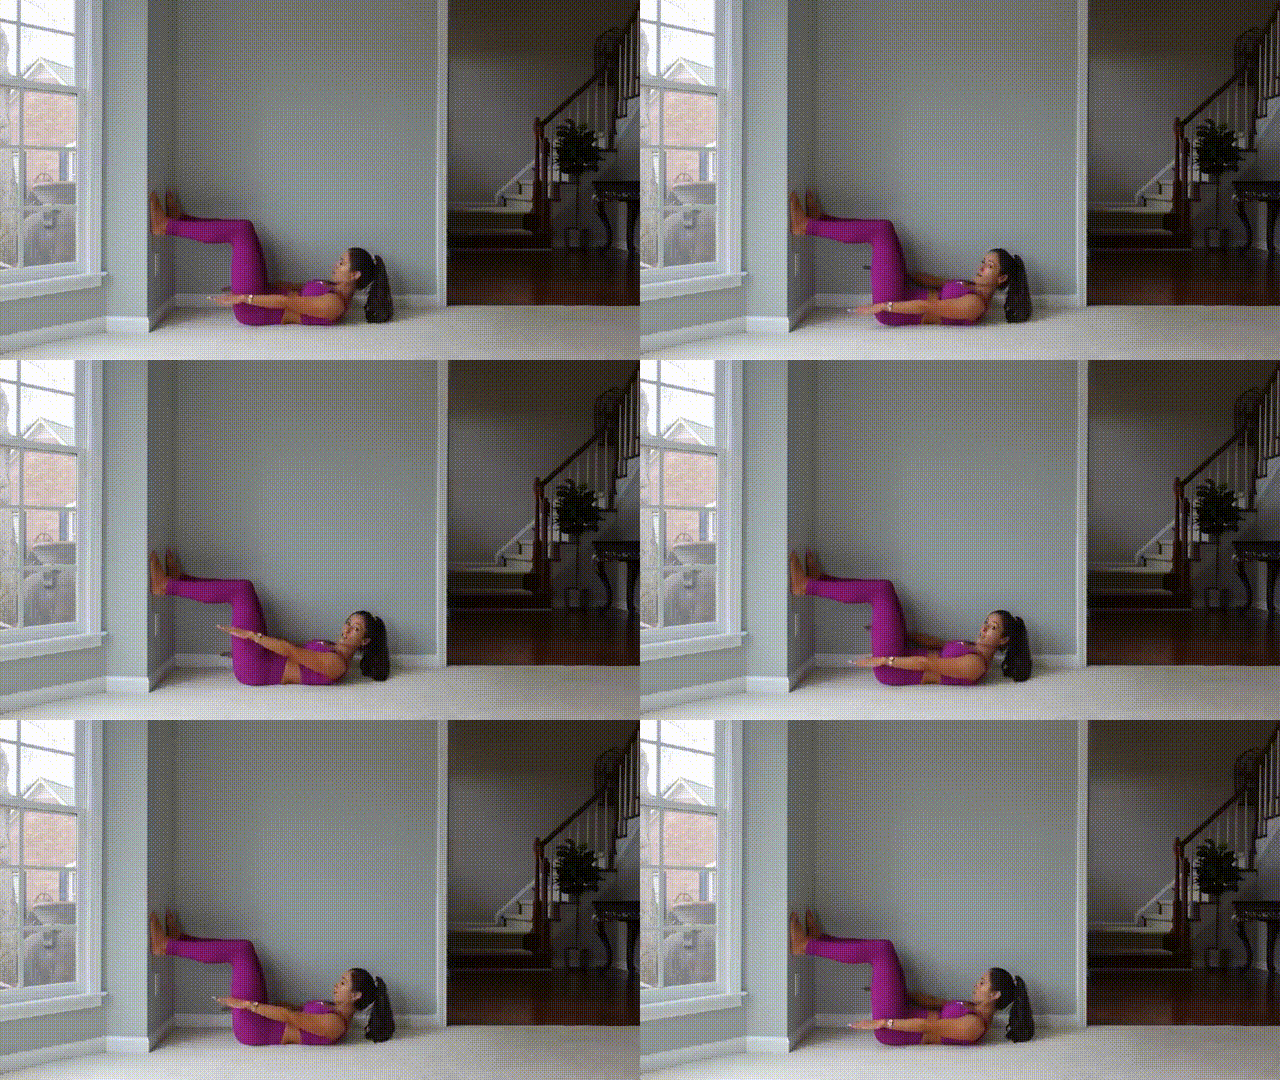
This one’s a bit different from traditional Pilates hundreds – you’ll alternate your arm pulses instead of doing both together.
It might feel strange at first, but different is good for challenging your body in new ways!
How to perform:
- Flex up (curl up) and hold this position (isometric exercise).
- Start with either arm and perform small vertical pulses with the arms.
- Alternate the right and left arm pulses continuously for 30 seconds.
- Maintain a steady and stable position, staying lifted in the abs.
Arm Circles
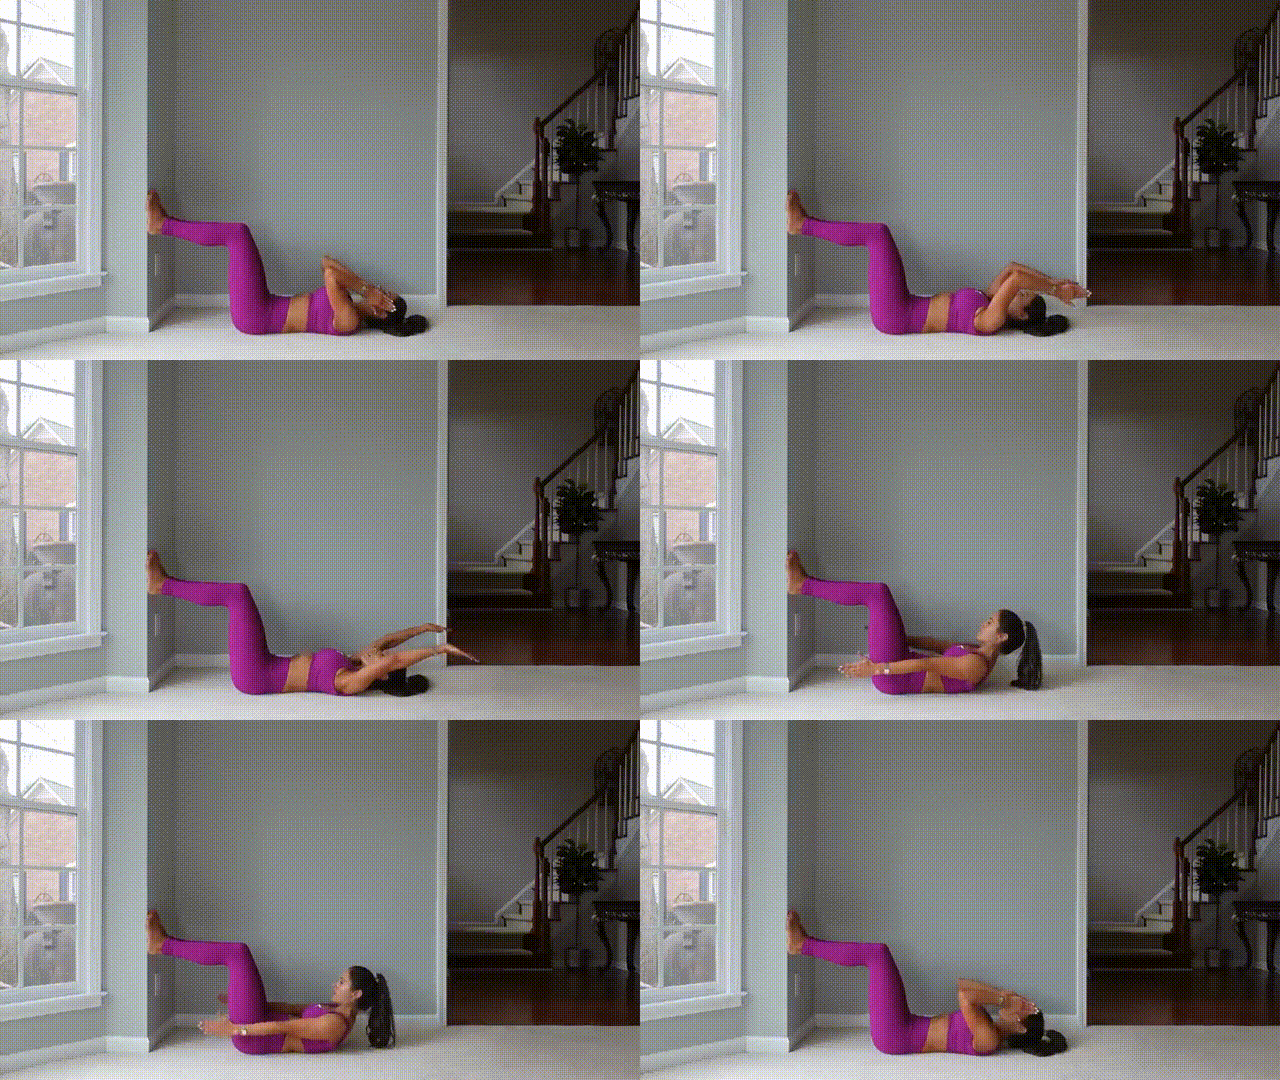
Here’s where things get flowing and graceful. You’ll combine arm circles with crunching movements, and it takes some coordination to get the timing right.
Focus on that deliberate contraction as your arms come down.
How to perform:
- Start with your hands/arms by your ears.
- Inhale as you reach your arms overhead (back).
- Exhale as you flex forward (curl up) while the arms circle down by your hips.
- Repeat the circle in the opposite direction: Exhale as you flex up (arms move down to hips), and Inhale as you circle around (arms move up/back to ears).
- Perform 10 repetitions in each direction.
Long Lever Crunch
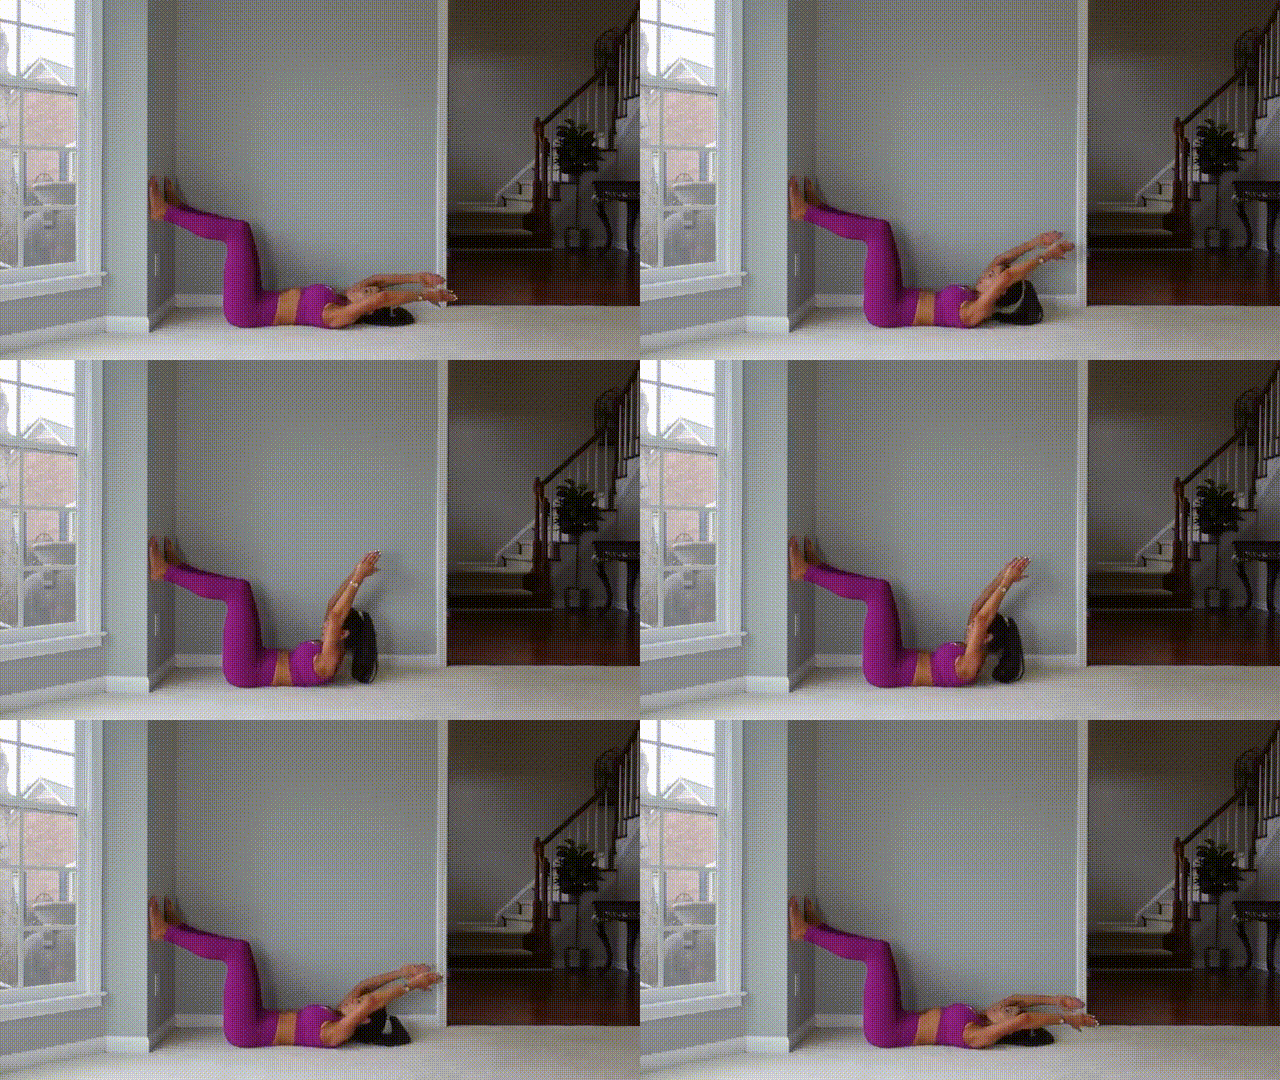
Ready for more of a challenge? By placing your arms by your ears or face, you’re creating a “long lever” that makes your abs work much harder.
Take it slow and controlled – you’ll definitely feel this one!
How to perform:
- Extended arms above head
- Exhale as you flex up (curl up).
- Inhale as you lower back down.
- Perform the movement slowly and with control.
Wall Curl with Hold
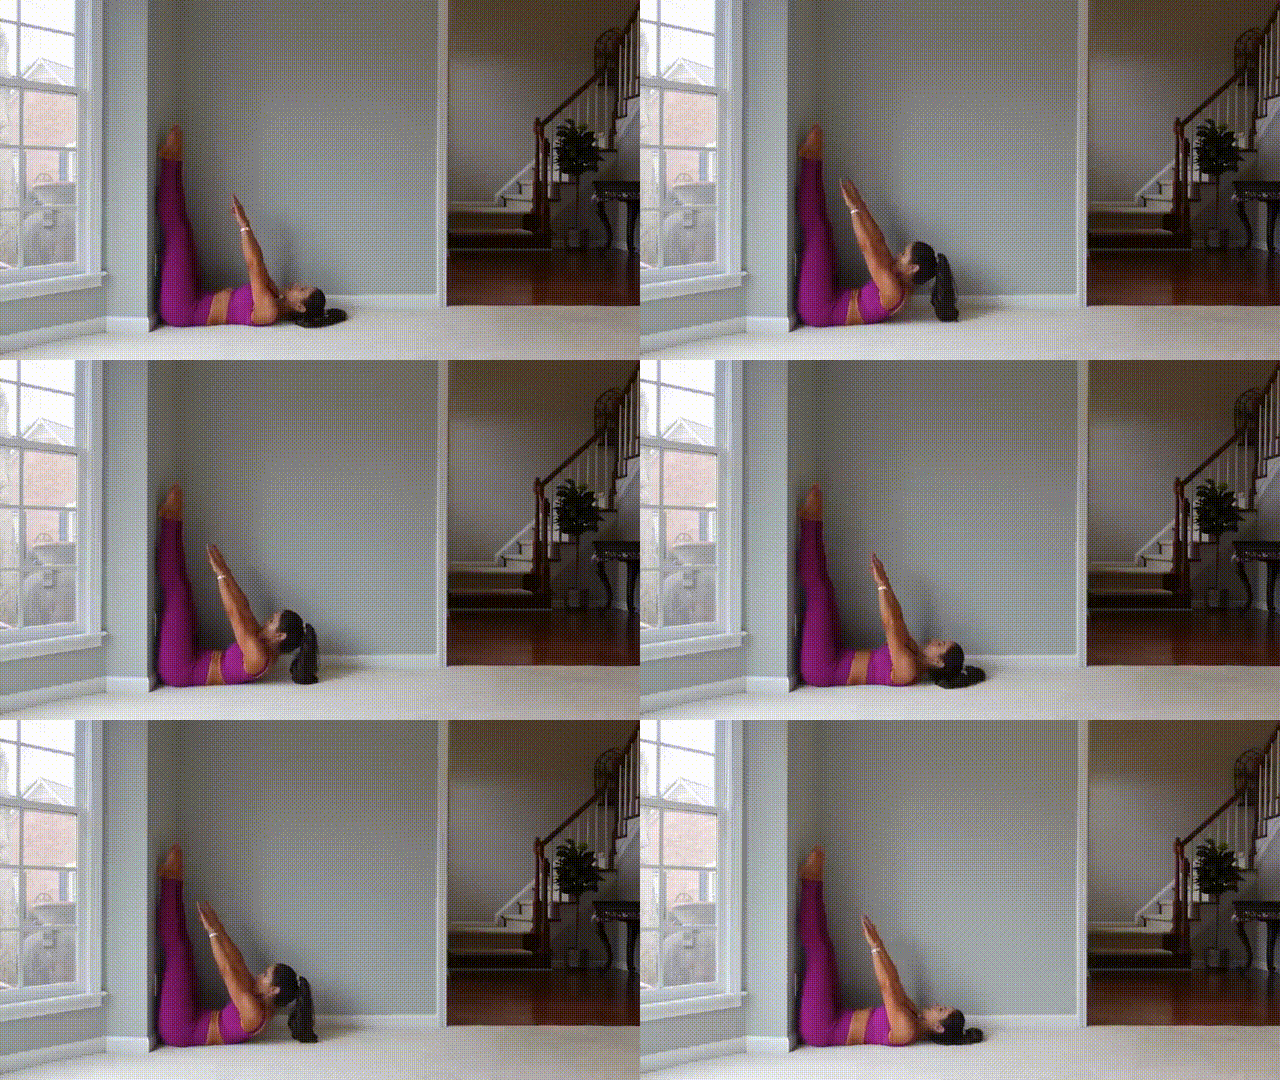
Time to test your endurance! You’ll scoot right up against the wall and hold that flexed position for three seconds.
The wall supports your legs so you can focus on keeping those abs engaged.
How to perform:
- Scoot right up against the wall.
- Extend your legs up against the wall.
- Extend your arms up towards the ceiling.
- Flex up (curl up).
- Hold the position for a count of three (one, two, three).
- Come back down.
Reverse Reach Crunch
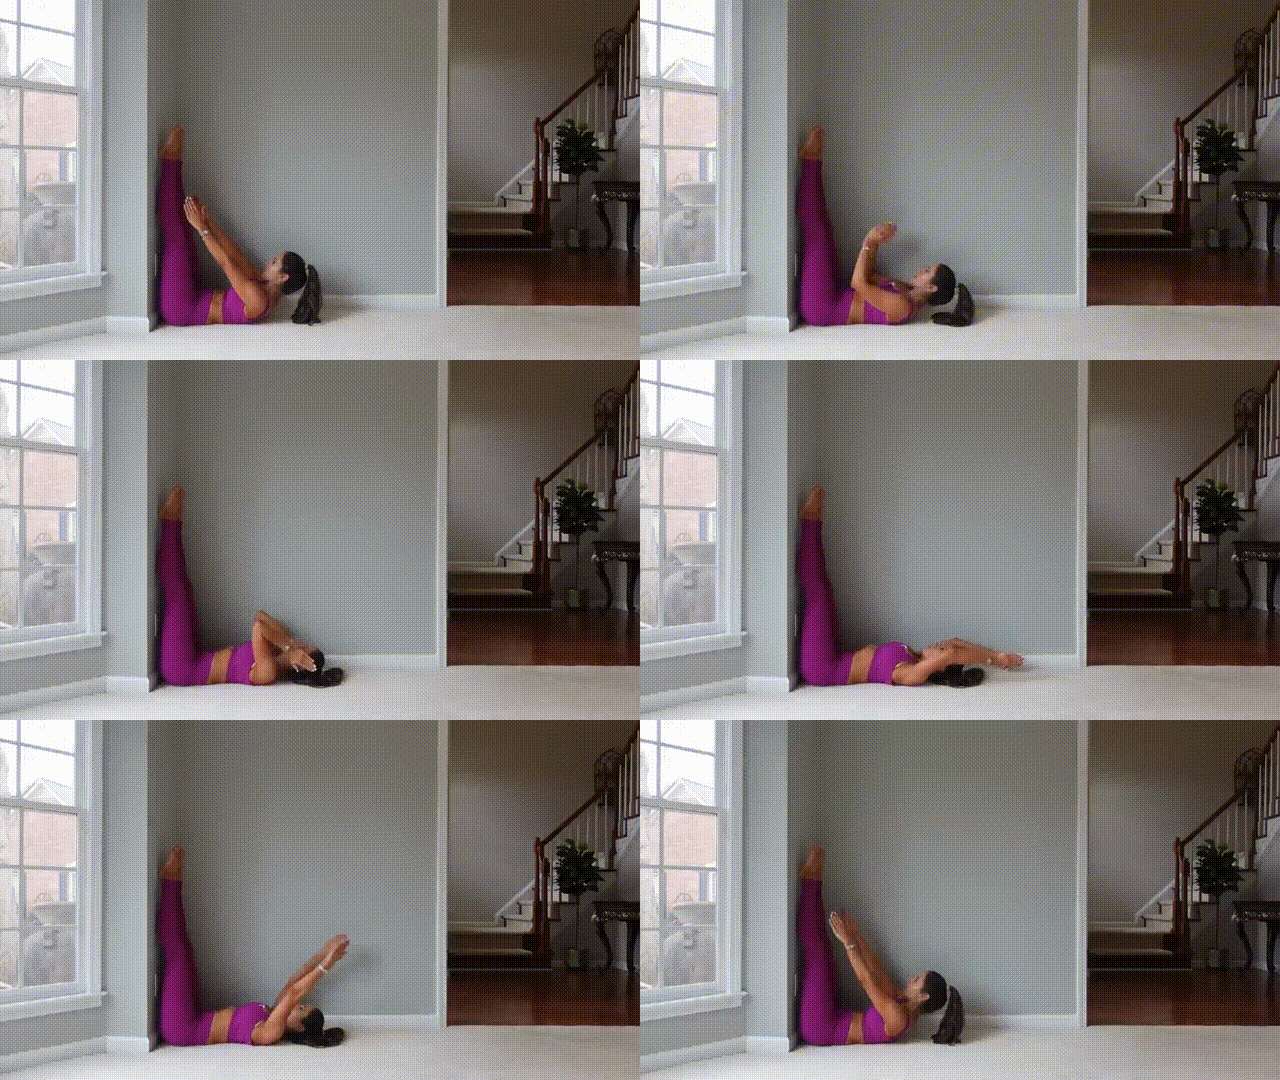
This exercise flows between reaching toward your feet and reaching overhead as you flex up and down.
You’ll get deeper into those lower abs when your feet are up like this.
How to perform:
- Start flexed up.
- Exhale as you reach towards your feet.
- Inhale as you lower down, reaching your arms overhead.
- Flex up again (arms come back down).
- The second way involves coming down, flexing up (arms come down), and trying to make the movement smooth.
Alternating Reach (Oblique Twist)
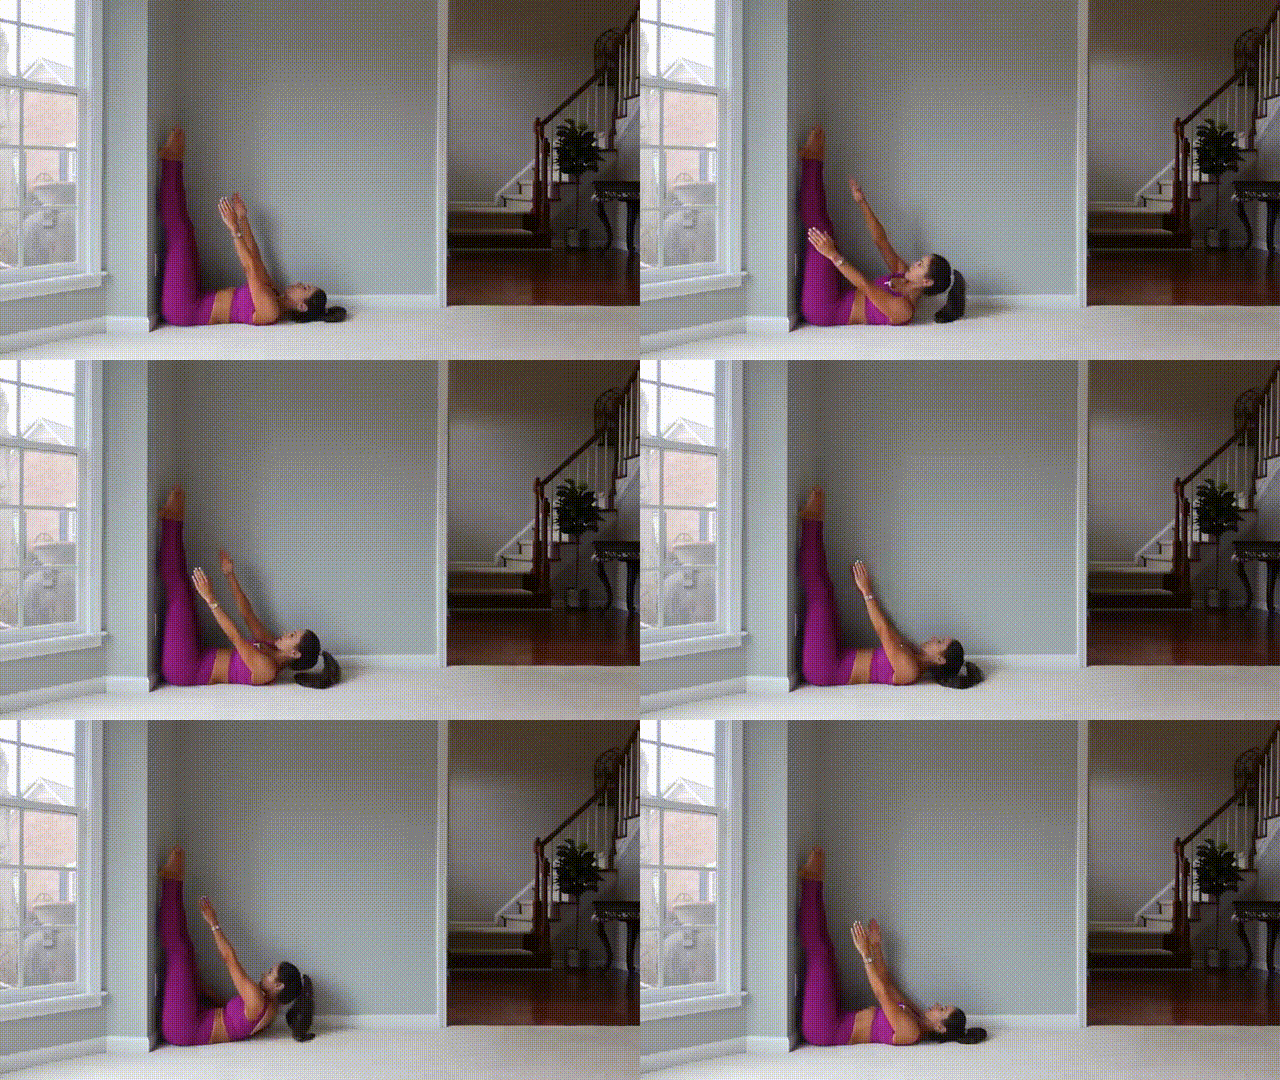
Just a tiny oblique twist as you reach toward each foot – five on each side.
It’s not about big movements here, just controlled rotations that target those side muscles effectively.
How to perform:
- Perform a tiny oblique twist as you curl up.
- Reach up towards the left foot, then come back down.
- Reach up towards the right side (towards the right foot), then come back down.
- Alternate between sides for five repetitions on each side.
Bicycle on Forearms
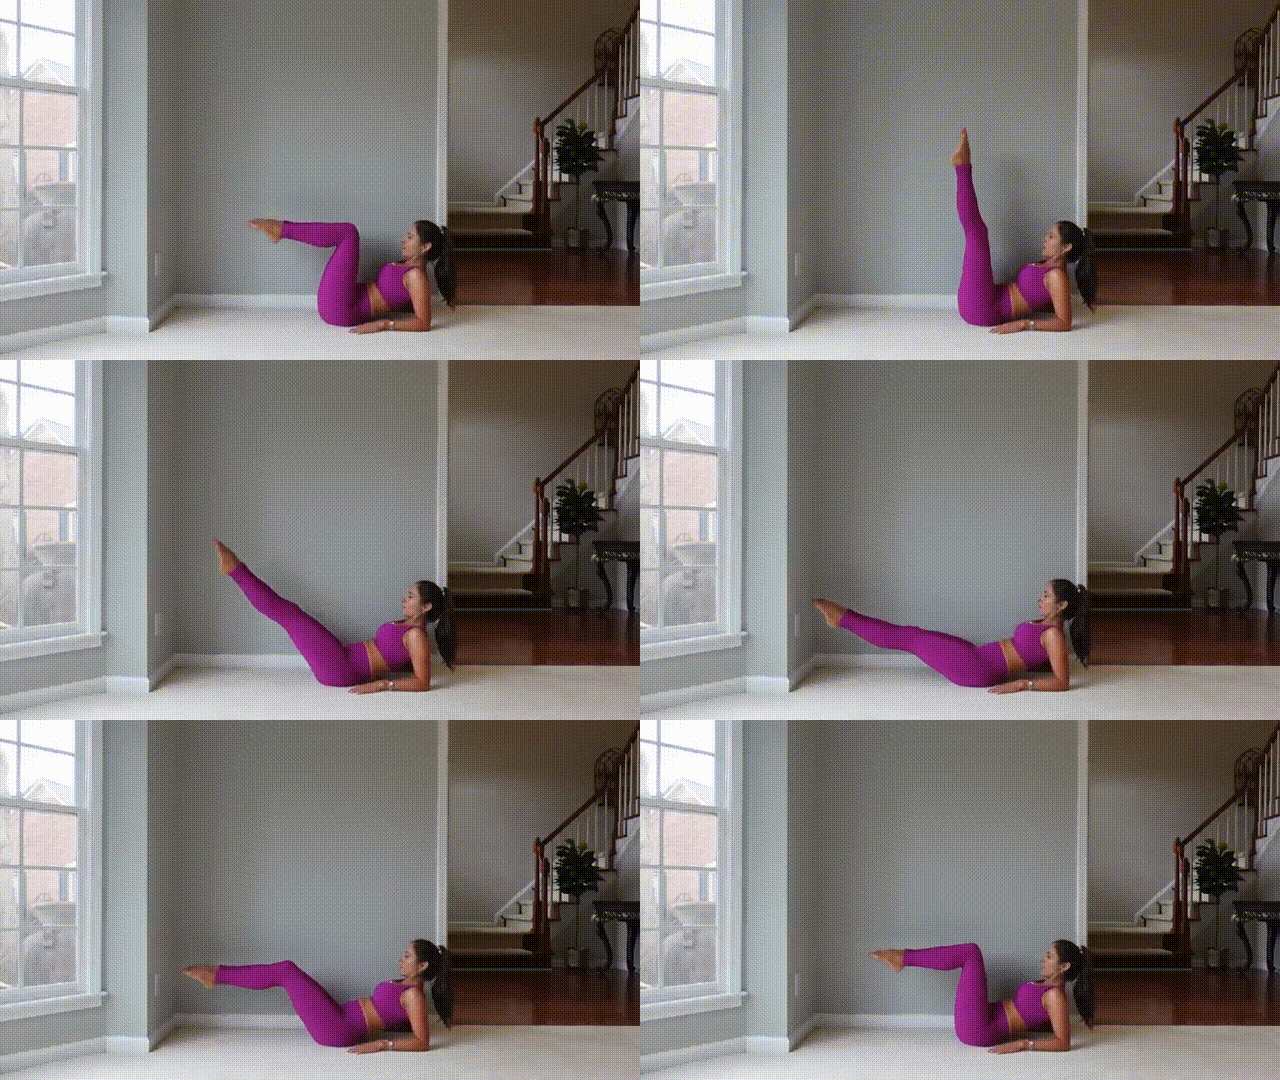
Time to move away from the wall and challenge those lower abs!
You can do one leg at a time if you’re starting out, or try both legs if you’re feeling ambitious.
Only go as low as feels comfortable – no hero moves here!
How to perform:
- Move away from the wall and come onto your forearms.
- Start with one leg in a tabletop position.
- Extend that leg up.
- Lower it down.
- Bring it back to tabletop.
- Exhale as you lower down. Only go as low as is comfortable (not feeling it in the lower back).
- Keep the movement slow, controlled, and with good form.
Lowering and Lifting Both Legs
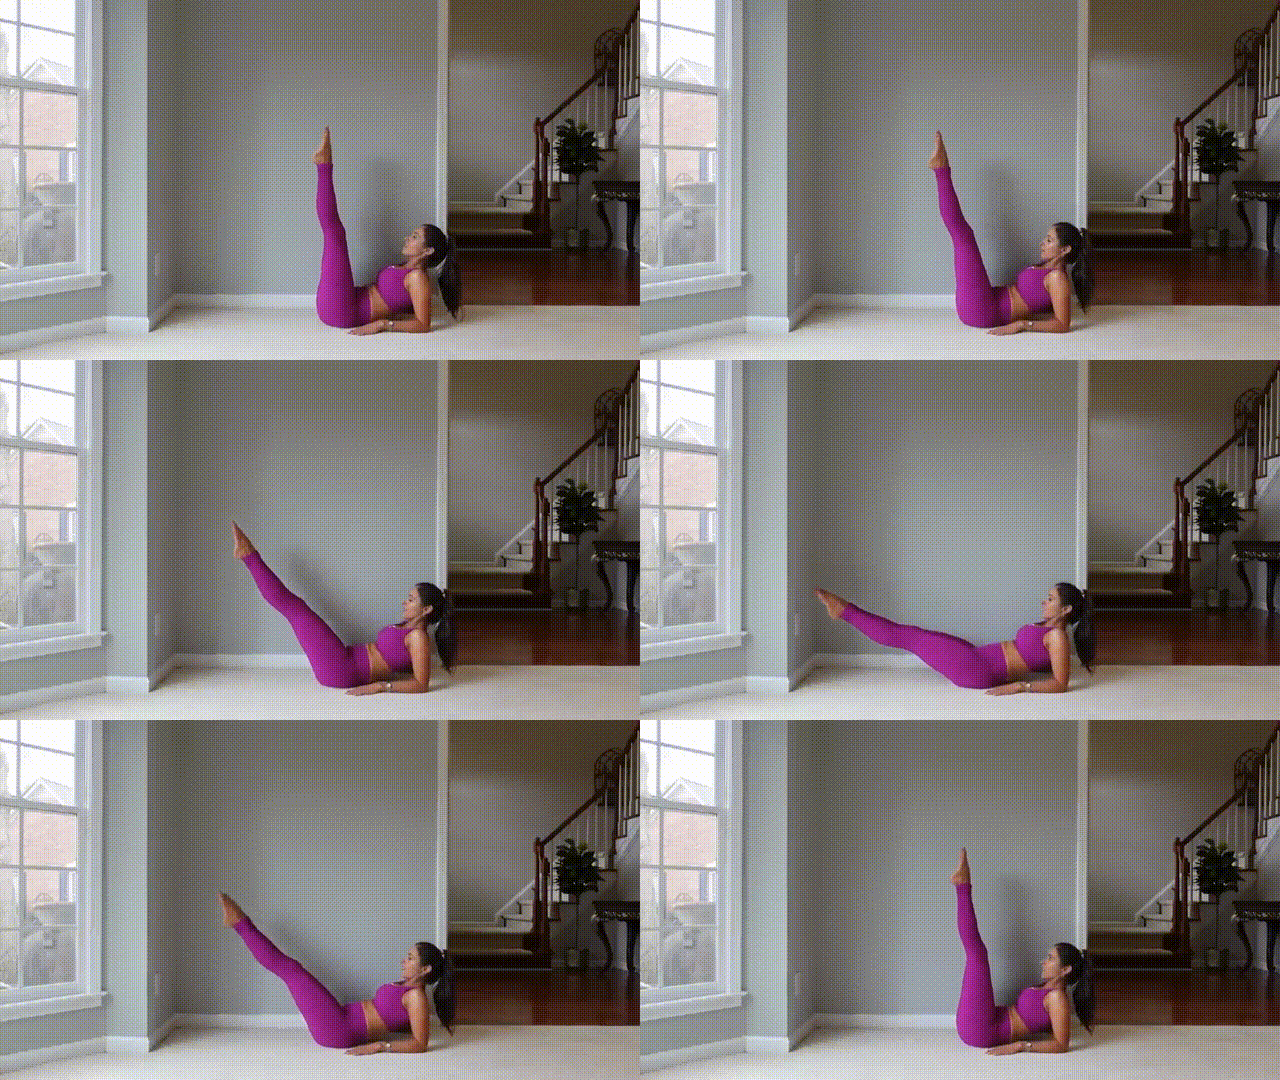
This one works your hip flexors quite a bit, not just your abs. If you’re into running or sports, you’ll love this exercise.
Go slow and controlled, and remember – one leg at a time is perfectly fine if both feel too challenging.
How to perform:
- Start the exercise on your forearms, away from the wall.
- Begin with both legs lifted up toward the ceiling.
- Lower both legs down (as far as is comfortable for your lower back).
- Lift them back up to the starting position.
- Keep the movement slow and controlled throughout.
Open/Close Leg Extension
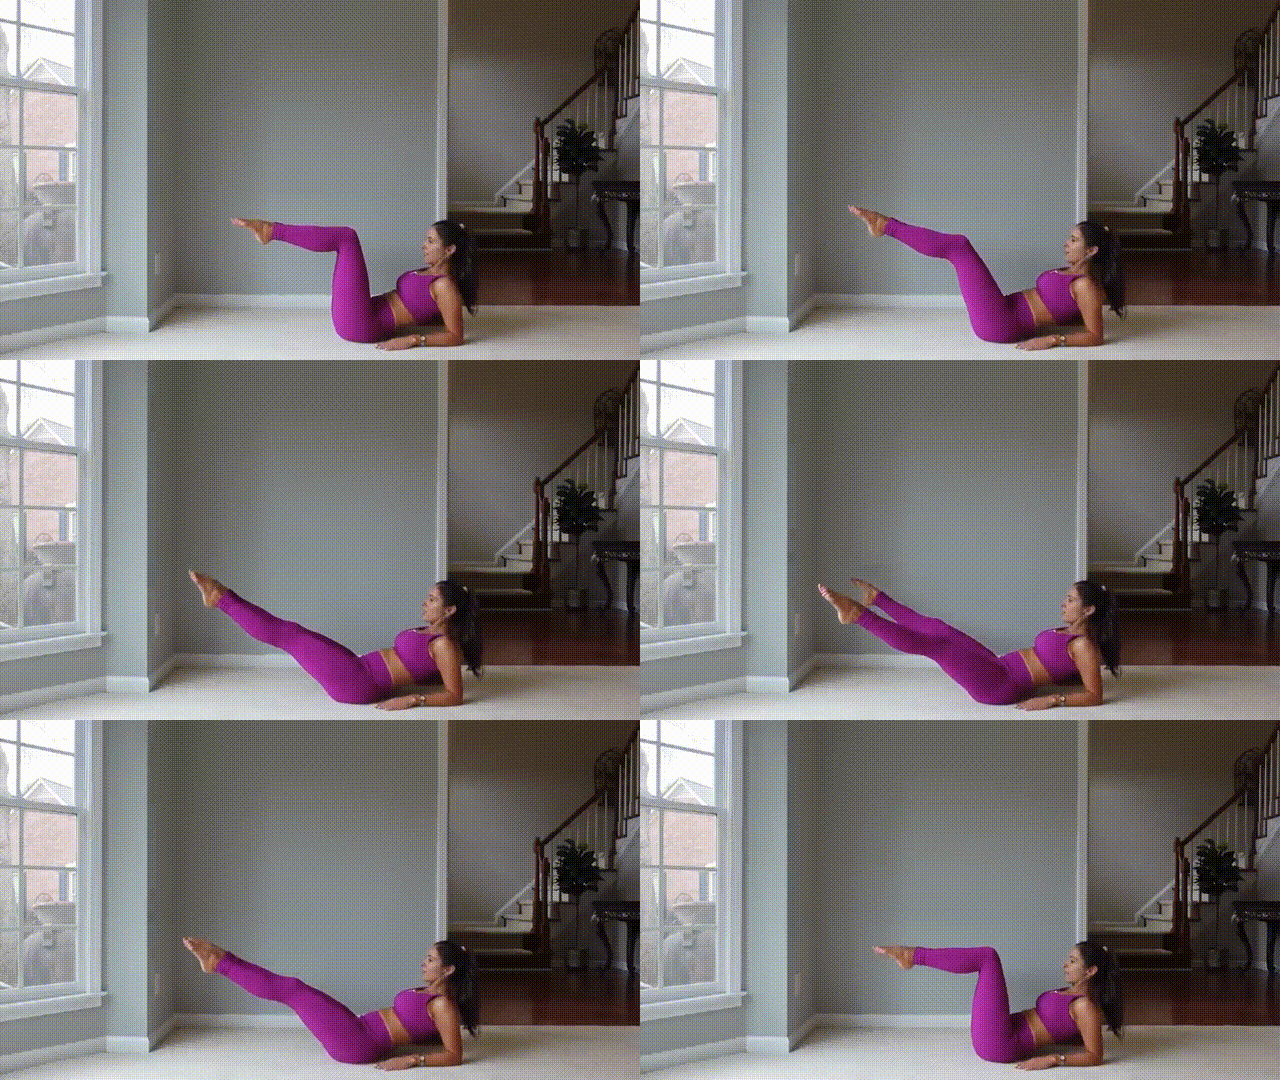
For this one, you’ll bring your legs out, open and close them, then bring them back together.
If it feels too intense, just modify by bringing your legs only slightly out – you’re still getting great work!
How to perform:
- Come back onto your forearms.
- Position your feet so they are about the same height as your knees.
- Bring your legs out.
- Open your legs.
- Close your legs.
- Bring them back together.
- Point your feet and keep your abs in and engaged.
Wall Side Plank Hold
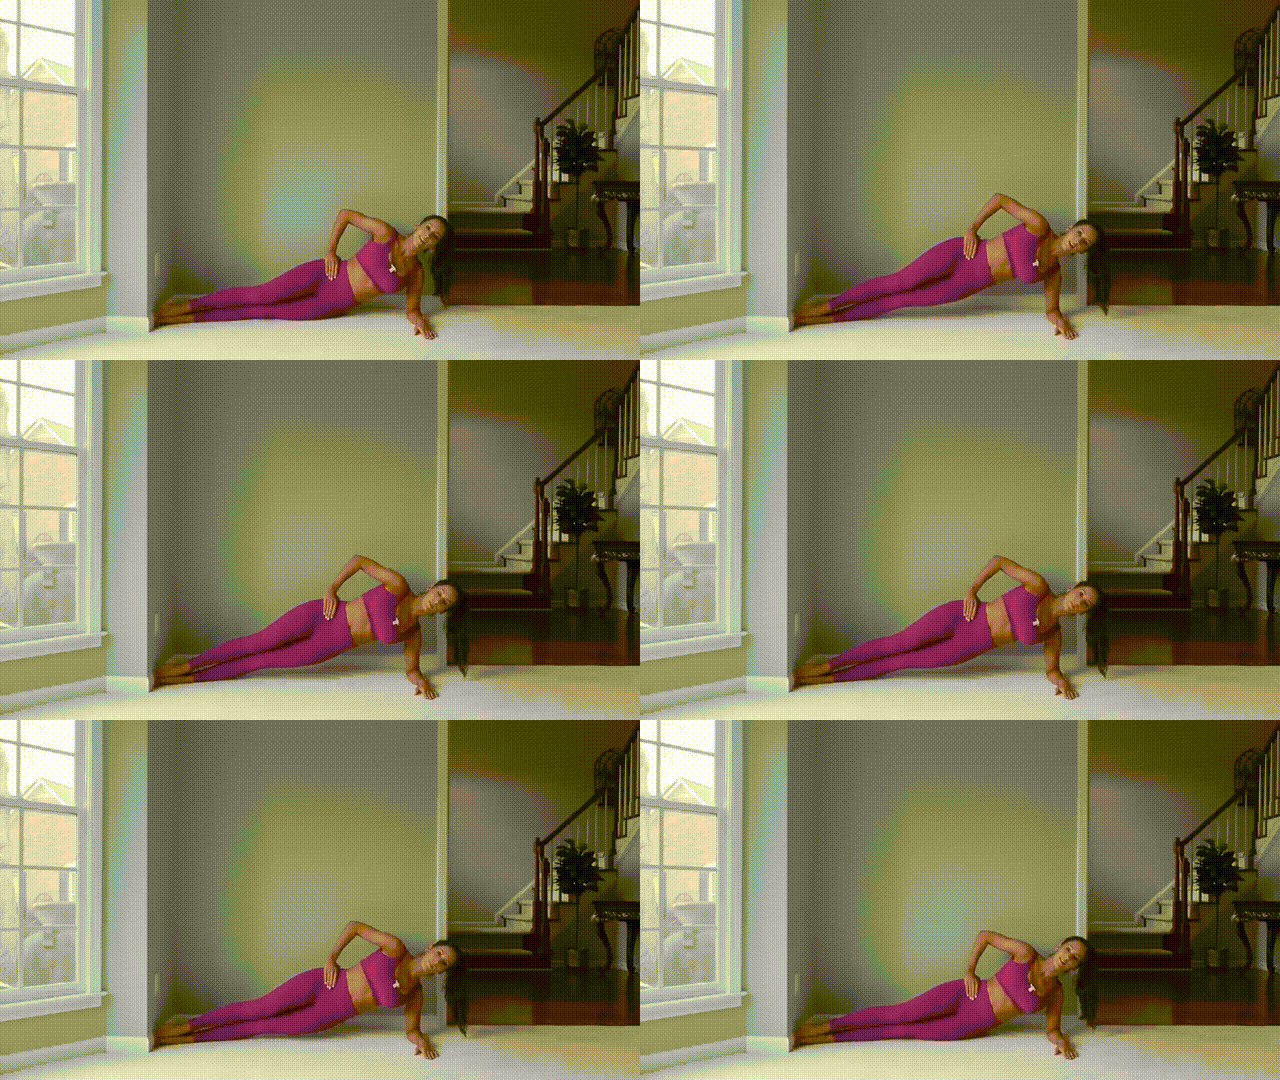
We’re finishing strong with side planks! You’ll hold for three counts, three times on each side.
This is all about those obliques helping you lift up, so don’t worry if it takes some practice to find your balance.
How to perform:
- Start with your feet up against the wall (optional).
- Come onto one side (e.g., left side).
- Place your elbow right underneath your shoulder.
- Stack your hips directly on top of each other.
- Lift up into the plank position.
- Hold for a count of three (one, two, three).
- Come back down.
- Repeat three times on each side.
Article Medically reviewed by
I’m fitness coach Ashley Castleberry, an NASM-certified personal trainer and nutritionist, as well as a coach on an established YouTube Channel with over 1 million followers. With certifications from major fitness brands, I specialize in athletic, HIIT, and strength training. Leveraging my experience coaching clients on lifestyle changes, I provide customized exercise and nutrition guidance to help people reach their fitness goals, whether that be weight loss, muscle gain or overall health improvement.
